GPT Image 1.5 for Print on Demand: A Practical Etsy Review
I remember the first time I tried an AI image model for a poster I planned to sell on Etsy. I was chasing speed — I needed consistent collections, quick edits for different sizes, and mockups that looked real without hiring a photographer. GPT Image 1.5 arrived while I was midway through a six-week push to build 200 listings. Its instruction-following and edit tools cut my iteration time in half, and that changed how I thought about scale. This article is a hands-on account of what worked, what didn’t, and the specific workflow I use now to turn a prompt into a test print, a listing, and, if it performs, a scaled product line.
If you sell posters on Etsy or run any print-on-demand business, you care about predictability, margins, and speed. GPT Image 1.5 gives predictable edits, fast generation, and embedded provenance metadata (C2PA), which matter when you need to match color palettes across a dozen sizes and keep a record of how each design was produced. I’ll show the exact prompts I use, the preflight checks that stop returns, how I price with Printshrimp as my preferred printer, and why automation tools like Artomate save me days of grunt work. Read this if you want a practical, tested path from idea to listing, not marketing fluff.
How I started using GPT Image 1.5 for posters
Why I switched
I was juggling three problems: slow iteration, inconsistent style across sizes, and the grind of producing mockups. Before GPT Image 1.5 I used a mix of older image models and freelance retouchers. That worked for single designs but didn’t scale. When I first tested GPT Image 1.5 I noticed it followed precise composition instructions better than models I’d used before. That meant fewer round trips to the editor and fewer surprise elements in final images, which saved me time and money.
When you run a print on demand AI operation, the invisible costs are often the worst — time to rework, inconsistent listings, and unforeseen printer issues. The first reason I switched was practical: predictability. GPT Image 1.5 consistently respected composition constraints and aspect ratios, which matters when trimming an artwork to A2 or 24x36. The second reason was editability: inpainting tools let me relocate key elements without regenerating the whole image. The third was provenance: the C2PA metadata built into GPT Image 1.5 outputs gave an audit trail I could store with the rest of my assets — a surprisingly useful feature when platforms ask for origin details.
The first wins
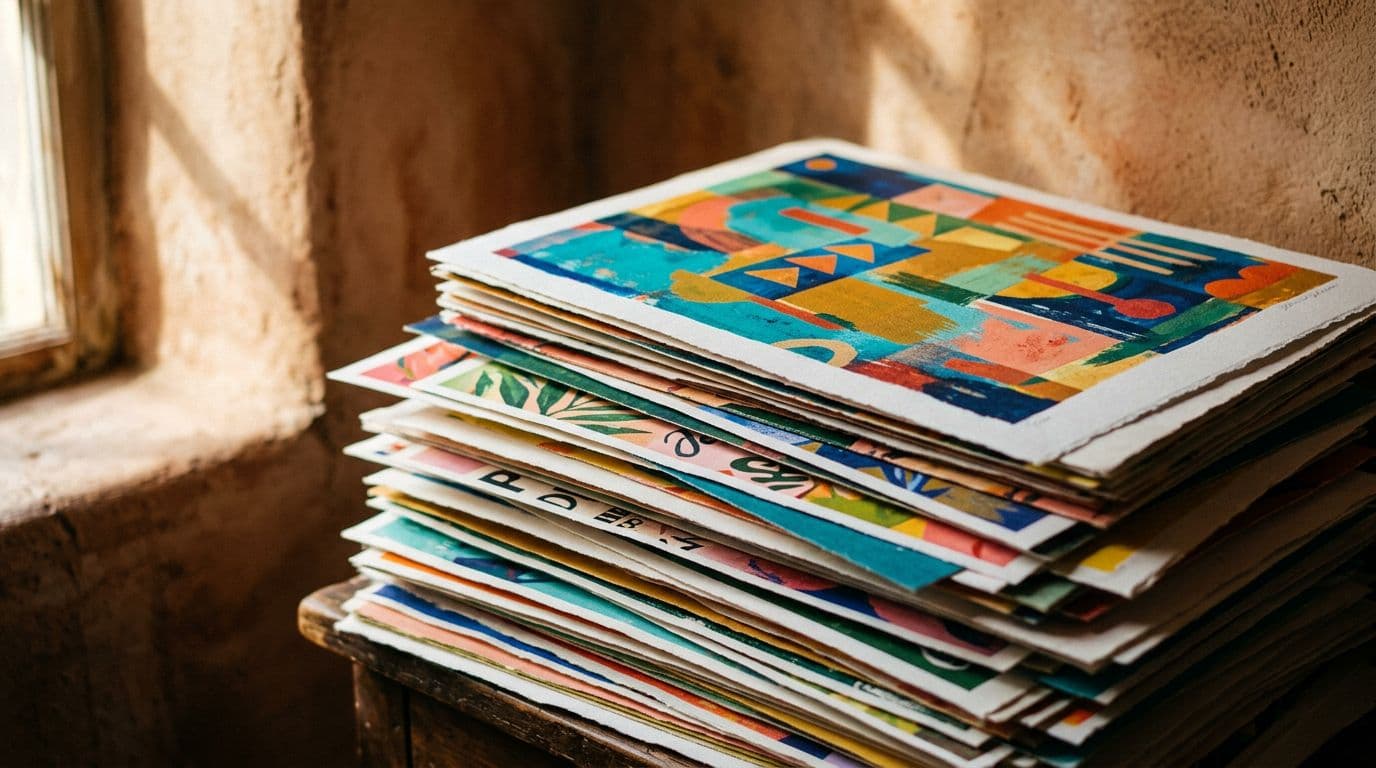
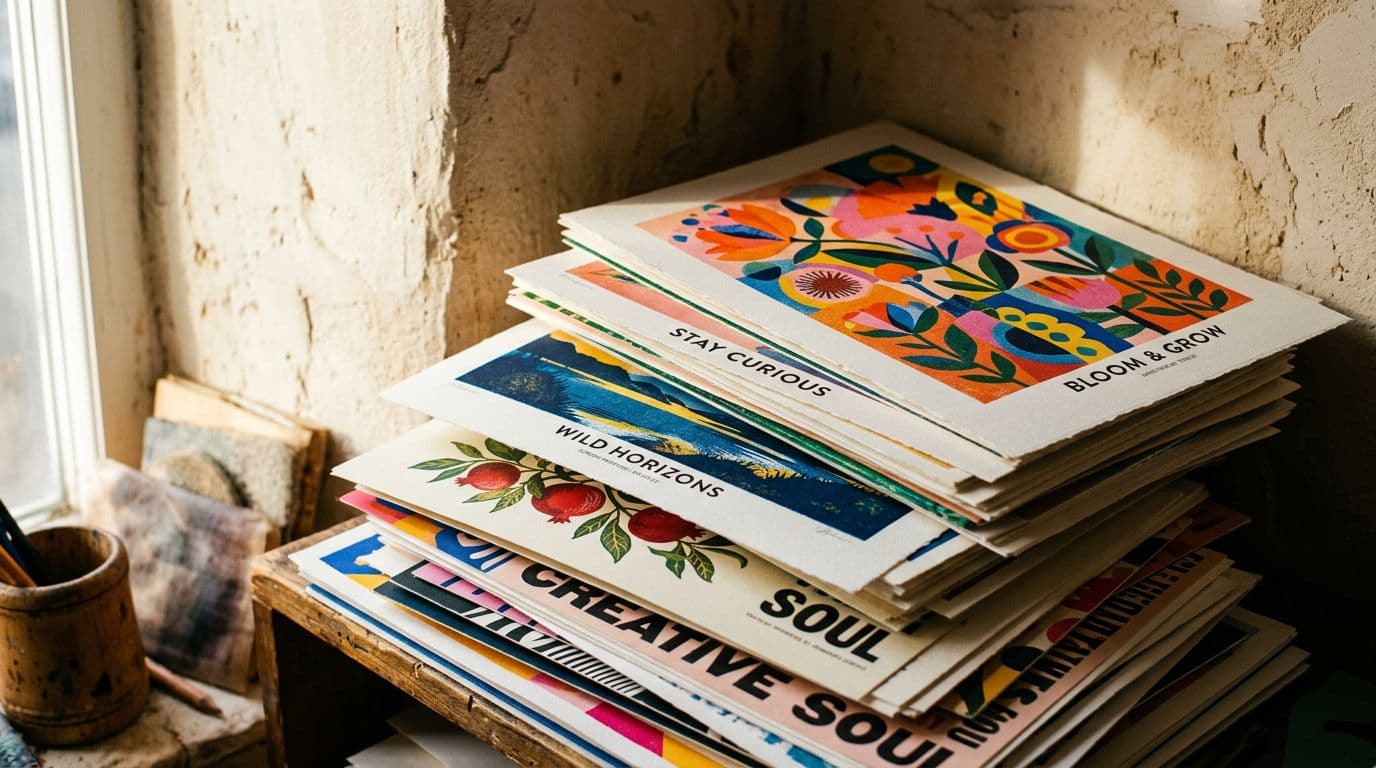
My first real win was a minimal boho botanical collection. I generated a base artwork, asked GPT Image 1.5 to create three colorways and two crops, and then used inpainting to tweak the frond placement for A2 and A1 crops. The result matched across sizes and looked like a single collection. I ordered a test print from Printshrimp and the color fidelity was surprisingly close to screen, after a small color shift fix. That small test print turned into a listing that sold three pieces in a week.
A few specifics that helped: I used a structured prompt template (more on that below), I generated at the largest dimension I needed to avoid upscaling artifacts, and I kept a tight naming convention so I could find the correct files when assembling mockups. The model’s edit tools meant I rarely had to open Photoshop to nudge a leaf 30 px left or remove a stray highlight.
Expectations vs reality
I expected AI output to always need heavy retouch. In reality, most outputs were near-usable. The time sink was in preflight and proofing, not in getting the basic composition right. You still need to check resolution, export settings, and text in image. You also must save prompts and edit notes. Those records matter later if anyone asks where the design came from.
Reality also includes surprises: sometimes a shadow that looked intentional on-screen printed as a muddy patch; sometimes thin hand-drawn lines disappeared in print; sometimes a subtle texture that read well at 1000 px became noisy at 4000 px. The solution is systematic preflight: a checklist for DPI, ICC profile, line weight, and margin safety. Once you adopt that checklist the mismatch rate falls dramatically.
Throughout this article I’ll refer to OpenAI image generation capabilities, but the practical advice applies to any robust GPT image model Etsy sellers might try. Think of GPT Image 1.5 as the engine — the process and checks are what protect your margins.
Technical strengths that matter for posters
GPT Image 1.5 is not magic — it’s a tool with specific strengths that align with the needs of poster sellers. Below I break down the attributes that mattered most and how to apply them.
Better prompt following
GPT Image 1.5 follows instructions tightly. When I specify exact composition, palette, and aspect ratio, the model reliably delivers. Practically that means I can write a prompt like 'Minimal boho botanical poster, muted terracotta palette, single central palm frond, soft grain texture, 3:4 aspect, high detail, print-ready' and get an image that matches the brief. That predictability cuts down on wasted generations, which saves credits or API cost and speeds the workflow.
To illustrate, here are three prompt variations and their typical outcomes:
- Seed prompt (broad): 'Boho plant poster' — outcome: many stylistic surprises, inconsistent negative space, fewer guarantees on composition.
- Structured prompt (precise): 'Minimal boho botanical poster, single palm frond centered, terracotta and sand palette, subtle paper grain, 3:4 vertical, high detail, print-ready, no watermark' — outcome: tight composition, consistent palette, fewer iterations.
- Edit prompt (inpaint): 'Same composition; move palm frond 10% left and reduce leaf overlap on bottom right; keep grain; preserve palette' — outcome: localized change that keeps the rest of the design intact.
Consistency is the secret. When you can reliably get the composition you want on the first or second generation, you save hours over weeks of production.
Editing and inpainting
The edit tools are where the model shines for posters. Rather than redo a design for every size, I use inpainting to shift elements so important parts of the composition stay readable in each aspect ratio. For example, moving a central leaf slightly for a vertical poster kept the negative space balanced. Those edits are quick and keep the collection cohesive.
Inpainting workflow tips:
- Start with the largest canvas you’ll sell. Mask only the area that needs adjustment for the crop.
- Keep edit prompts short and concrete: 'Move main frond 60 px left; preserve texture and lighting; avoid new elements.'
- Maintain color continuity by asking the model to 'match existing palette' rather than 'use similar colors.'
- If replacing a background, preserve grain and paper texture by including 'maintain paper grain and edge shadowing.'
I also use inpainting to fix small printing problems spotted in test prints: filling in thin gaps, reinforcing line weight, or removing pixel-level artifacts. In many cases an inpainted fix is faster and cheaper than a full redraw.
Provenance and C2PA metadata
GPT Image 1.5 embeds provenance metadata using C2PA. I treat that as a record-keeping feature. When I save outputs I also export the prompt history and the C2PA metadata. That gives me a defensible trail of human choices — the prompts I wrote, the edits I made, and decisions about which variant to publish. With ongoing legal and platform attention around AI, that documentation matters more than you might think.
How I use provenance in practice:
- Store the C2PA file beside the final flattened TIFF/PNG in my asset directory for each design version.
- Keep an export of prompt history as plain text in a versioned Google Sheet or Git repo so I can reproduce a look if needed.
- Attach a short provenance note to the listing back-office file: 'Created with GPT Image 1.5; Edited: inpainted leaf placement; Test print: 10 Feb 2026; Printer: Printshrimp (profile: PRSH-ICCSRGB-v1)'.
That short record has already saved time during a platform review and makes it easy to comply if Etsy or a buyer asks about how the work was created.
Creating print-ready files: resolution, color, and proofing
This section covers the pragmatic, sometimes tedious details you must get right. Skipping them costs returns, poor reviews, and wasted ad spend.
Resolution and DPI
Posters need real pixels. I aim for 300 DPI equivalent for my largest print size. Practically that means exporting at least 4000–6000 px on the long edge depending on the largest size I’ll offer. I’ve learned the hard way that screen-friendly images that look sharp at 1000–1500 px often fall apart when scaled to 24x36 inches. Generate bigger or upsample with a quality tool. Don’t rely on low-res outputs.
Quick rules:
- For up to A3/smaller prints: 2500–3500 px long edge is usually sufficient.
- For A2/A1 and large 24x36: 4000–8000 px depending on whether you’ll crop or scale.
- If you generate at smaller sizes, use a professional upscaler (AI-based like Topaz Gigapixel or high-quality neural upscalers) and re-proof.
If you decide to rely on upscaling, test it once per aesthetic: some textures and painterly strokes upscale better than fine-line pen work.
Color profiles and soft-proofing
Most POD partners want sRGB; some ask for CMYK. I ask Printshrimp what they prefer and soft-proof in that profile. On one run I skipped soft-proofing and ended up with muddier greens than expected. After switching to consistent soft-proofing and adjusting the profile, I saw test prints align with screen previews. Use ICC profiles when your printer provides them and keep a step-by-step preflight checklist.
Practical color workflow:
- Ask your POD partner for their ICC profile and recommended export settings.
- Calibrate your monitor monthly using a hardware calibrator (X-Rite or Datacolor).
- Soft-proof in your editor using the printer ICC. If greens or blues are off, make small hue/saturation adjustments and re-proof.
- Export with the profile embedded when the printer requests it, or convert to their preferred color space if instructed.
Small tweaks matter: lowering the saturation by 3–5% in the green channel or nudging midtone luminance can dramatically improve a test print without altering the visual feel on screen.
Test prints and iterating
Order test prints before you list anything. I always print one size of each new design. That test print catches issues no screen will show — paper texture, color shifts, how thin lines survive printing, and whether type remains crisp. A single test print may cost a few pounds, but it prevents returns and bad reviews which cost far more.
When I evaluate a test print I look for:
- Color fidelity and saturation drift
- Line weight integrity (especially thin lines)
- Detail retention in textured areas
- Edge-to-edge printing consistency
- Whether the paper finish matches the mockup (matte vs semi-gloss)
If anything is off, I document exact changes in the prompt history and make one targeted edit (not multiple). Then I reorder a test print if necessary. After two proven runs, the same prompt-to-print path is reliable for scaling.
Prompt engineering: templates that produce repeatable results
Consistent prompts are the single most effective productivity tactic I use.
Seed prompt patterns I use
I use a consistent prompt structure to get repeatable outputs. My template looks like: mood, main subject, palette, composition, texture, aspect, finishing notes. For example: 'Warm minimal botanical poster, single palm frond centered, terracotta and sand palette, soft grain texture, 3:4 vertical, high detail, no visible watermark, print-ready.' Having that template means I don’t reinvent the scaffold each time. I tweak specifics like 'add subtle vignette' or 'increase negative space on the left' for variants.
I store templates in a folder named /prompts/ with subfolders by collection name. Each prompt is saved as a plain text file and backed up to cloud storage. Example naming: boho-palm-2026-prompt-v1.txt.
Prompt examples and variations
Here are five actionable prompt templates you can copy and adapt. Use single quotes around stylistic callbacks when you paste them into a UI that accepts free text.
-
Minimal botanical base 'Minimal boho botanical poster, single palm frond centered, terracotta and sand palette, subtle paper grain, 3:4 vertical, high detail, clean negative space, print-ready, no watermark.'
-
Vintage travel-inspired poster 'Vintage travel poster style, stylized coastline with cliffs, muted teal and ochre palette, flat shaded shapes, 2:3 aspect, simulated lithograph texture, high contrast, print-ready, no text.'
-
Abstract colorblock series 'Abstract geometric poster, overlapping blocks of color, warm palette: terracotta, blush, sand, 4:5 aspect, smooth gradients, minimal grain, print-ready, ensure crisp shape edges, no photographic elements.'
-
Hand-drawn line art 'Fine line botanical illustration, single stem with leaves, monochrome ink on cream paper, 3:4 vertical, ensure thin-lines remain 0.5pt or thicker when scaled to A1, print-ready.'
-
Mockup background for lifestyle shot 'Neutral living room wall texture, soft shadow from left, subtle vignette, 16:9 crop suitable for framed hero shot, natural window light, high resolution.'
Each template is followed by a short set of edit instructions when needed. Use 'preserve' language: 'preserve texture,' 'preserve lighting,' 'preserve palette.' That avoids surprising recolors.
Iteration and versioning
I save every prompt iteration. When a colorway or crop works I label it with project-year-variant, like boho-palm-2026-vA1-terracotta. That label goes into the filename and my spreadsheet. The model can’t read your mind tomorrow; it will follow the prompt you saved today. Version control avoids the 'I can’t reproduce that exact image' problem when you want to scale.
Practical versioning example (spreadsheet columns):
- project_id
- prompt_filename
- prompt_text (short)
- generation_date
- output_filename
- colorway
- aspect
- test_print_date
- print_notes
- final_release_flag
This makes it trivial to re-create a variant, audit changes, or revert to a previous prompt that generated a top performer.
Avoiding trademark and likeness risks
I never prompt for famous musicians, trademarked logos, or recognizable characters. If you ask for a 'movie poster style' you risk producing something too similar to copyrighted work. I stick to descriptive language and original concepts. If you want a celebrity vibe, I describe the style instead: '1980s synthwave portrait, shaggy hair, neon backlight,' not 'actor X with neon hair.' That keeps me clear of likely takedowns.
If you ever produce something that looks too close to a trademark or celebrity, remove it from listings immediately and document the prompt and edits you used; keeping the provenance helps in disputes.
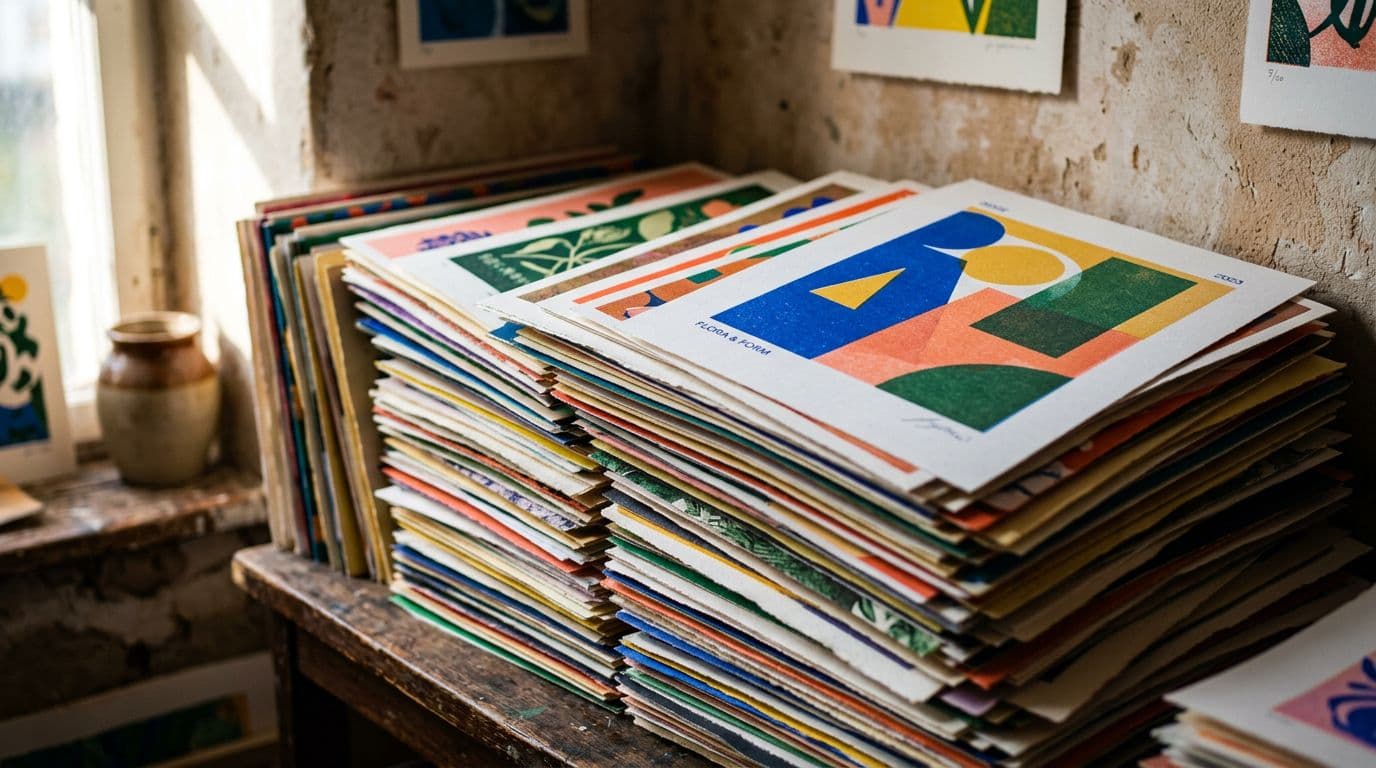
Workflow for scaling collections and variants
This section digs into the step-by-step process I use to move from 1 design to 50+ variants without chaos.
Use edits to keep collections consistent
When I want a collection of ten colorways, I generate one strong base and then use GPT Image 1.5’s inpainting to recolor and tweak. That keeps the composition identical across the set which buyers appreciate. It also saves time versus generating ten separate images from scratch and then trying to match them manually.
Example process for a 6-colorway series:
- Create base artwork at large resolution (A1 equivalent) with detailed prompt and texture notes.
- Save base file and provenance metadata.
- For each colorway, mask the fill areas and prompt: 'Change palette to [list colors], preserve shading and texture, maintain composition.'
- Export each recolor with consistent filenames and metadata.
- Generate crops/variants for smaller sizes using masked inpainting to re-balance composition.
- Order one test print of one colorway (preferably the most saturated) to verify printing conditions.
This approach keeps the series visually coherent and reduces back-and-forth.
Cropping and aspect handling
I design for the largest aspect first, usually the A1 or 24x36 size, then crop down for A2, A3, and small poster sizes. Cropping decisions are made in the prompt or by using masked inpainting to shift key elements. This approach keeps focal points readable at all sizes and reduces rework when a product variant needs a small tweak.
Tips for cropping safely:
- Keep an internal safety margin of 10–12% inside important elements so they’re never cut off in smaller aspect ratios.
- When converting a square crop into a vertical, mask non-essential background and inpaint to add vertical elements or extend negative space.
- For text overlays or signatures, keep them outside the safety margin or in reproducible positions so they’re not clipped.
Naming, metadata, and assets
File naming and metadata matter more at scale. I embed short notes in filenames and keep a central spreadsheet that maps prompt, output file, colorway, print sizes, and POD SKU. When I find a winning listing, I can generate more mockups and upload variants quickly because the assets are organised. This kind of asset hygiene turns chaotic growth into manageable scale.
Example filename convention:
projectID_descriptiveColorway_aspect_resolution_vN.png
Example: BPH-01_terracotta_3-4_6000px_v01.png
And an example metadata note attached to the file (or spreadsheet cell): 'Prompt: boho-palm-...; Generated: 2026-02-05; Edited: inpaint leaf left; ICC: PRSH-ICCSRGB-v1; Test print: 2026-02-12.'
This extra discipline makes it easy to find the correct asset when you need to update a listing or rerun an A/B test.
Mockups, lifestyle shots, and conversion optimization
Images sell posters. Good mockups increase click-through and conversion; poor mockups kill interest.
Mockup types that convert
A simple framed hero on a white wall works well, but I don’t stop there. I include a lifestyle shot that shows the poster above a sofa or console so buyers can picture scale. Close-up shots for texture and an unframed flat-lay help buyers understand the finish. I learned that lifestyle shots increase CTR and conversions, so I always include at least one realistic room mockup.
Mockup breakdown I use for each listing:
- Hero: framed poster on a neutral wall, 3:4 crop, natural lighting.
- Lifestyle: room shot with furniture for scale.
- Close-up: 1:1 crop showing paper grain and print detail.
- Flat-lay/unframed: shows paper edge and matte vs gloss finish.
- Variant grid: shows other colorways at a glance.
Creating mockups faster
I automate as much of the mockup work as possible. I have a handful of studio settings in my mockup templates — living room, home office, and bedroom. For each new design I generate five mockups with consistent lighting and framing so the collection looks cohesive. That consistency builds a stronger brand presence when a buyer browses several listings.
The mockup process I use:
- Export the final design at the correct aspect and resolution.
- Use mockup templates with smart objects or automation tooling to batch-place the artwork into scenes.
- Add consistent color correction layer and global shadow layer to unify lighting across images.
- Export variants: framed, unframed, with mat, cropped scale.
Mockup automation and time savings
Automation pays off once you pass a few dozen listings. Manually placing each graphic into mockups is slow. I use automation to batch-create framed and unframed variants, then pick the best hero shot. Tools designed for this task save hours a week. If you upload more than five listings a week, automation pays for itself quickly.
In practice automation reduced my time-per-listing from 2–3 hours to 10–20 minutes for all mockups and drafts, before manual title/tagging.
SEO, listings, and AI disclosure on Etsy
This section covers how I structure listings to capture search and convert browsers into buyers.
Titles, tags, and attributes that work
Etsy still rewards clear titles and full attributes. I front-load primary keywords: something like 'Boho Botanical Poster A1 — Terracotta Palm Frond Wall Art.' I use all 13 tags and focus on buyer phrases, not design jargon. Tags like 'terracotta poster A1' and 'minimal plant print' capture the searches that actually convert. Attributes are often overlooked but they act as filters; fill them out completely.
I use a title formula: PRIMARY KEYWORD — STYLE — SIZE — USE CASE Example: 'Boho Botanical Poster A1 — Terracotta Palm Frond Wall Art — Living Room Decor'
For tags, use a mix of specific and broad: 'boho poster,' 'terracotta wall art,' 'palm frond print,' 'A1 poster,' 'minimal plant art,' 'scandi poster,' 'living room print.'
Writing descriptions that sell
The first 160 characters of your description should answer buyer intent: size, finish, dispatch time, and shipping. After that I include a short paragraph on materials, a sizing chart, care instructions, and the brief AI disclosure. I avoid long marketing fluff. Buyers want the facts and a sense that the seller knows their product.
Example opening (first 160 characters): 'Boho Palm Frond Poster — A1, premium matte paper, shipped from EU within 2–4 business days. Choose framed or unframed. See full size chart below.'
Use bullet points for key info: size options, paper type, framing options, dispatch time, returns policy. End with a call to action: 'Add to cart to reserve this print.'
AI disclosure wording and placement
I include a short disclosure in the description and in the production/materials area: 'Design created with GPT Image 1.5 and curated/edited by [seller name].' That wording is brief and honest. Etsy asks for disclosure and doing it builds trust. I also keep the prompt history and C2PA metadata in my records in case I ever need to show how a design was made.
Examples of disclosure placement:
- Near the bottom of the product description under 'Production' heading: 'This design was generated using GPT Image 1.5 (OpenAI image generation) and refined by hand.'
- In a short sentence under the hero image: 'AI-assisted design — see full creation notes in the product description.'
Include provenance if buyers ask: offer to share the prompt history and test print notes. That transparency reduces disputes and shows professional care.
Choosing POD partners and pricing math
Selecting a POD partner changes your margins and customer experience. I use Printshrimp because their pricing and shipping model fit my setup, but the principles here apply no matter which POD you choose.
Why I recommend Printshrimp for posters
I use Printshrimp as my go-to for posters because their pricing and shipping-included model fits my margins. An A1 prints at about £11.49 including shipping from their UK/EU/US/AU facilities. Selling that at £34.99 gives me roughly £20+ gross profit after Etsy fees and typical payment processing. Those kinds of margins let me fund ads or reinvest in more designs.
Beyond price, consider these POD partner criteria:
- Consistent color profile and available ICC files
- Reasonable base cost with shipping included or transparent shipping tables
- Multiple fulfillment regions to reduce shipping times
- Return handling and sample proofing policies
- Integration options (CSV, API) for automation
Pricing examples and margin calculations
I price a 12x16 or A2 poster differently from an A1. For smaller posters I often price around £12.99 to £16.99 depending on size and expected demand. For larger A1 or 24x36 prints I aim for £34.99. Remember Etsy takes listing + transaction + payment processing — practically about 10% total — and Offsite Ads can take 12–15% if an order is attributed. Model those costs before you promote a listing heavily.
Example margin calculation (A1):
- Printshrimp A1 cost (incl shipping): £11.49
- Etsy fees and payment processing estimate (10%): £3.50 (on £34.99)
- Offsite ad attribution (if applicable): up to 15% = £5.25
- Net before other costs: £34.99 - £11.49 - £3.50 - £5.25 = £14.75 (best case without Offsite Ads)
If the Offsite Ads are applied, the margin drops. Account for returns, customer service time, and ad spend when budgeting. I usually hold a 30–40% target gross margin to make campaigns sustainable.
Shipping, returns, and customer expectations
Shipping costs can kill a listing if you don’t account for them. Printshrimp includes shipping in the product cost which simplifies pricing. I also clearly state dispatch times and include photos of a real print in listings to reduce returns. If you’re selling internationally, test shipping times and pricing for your key markets before you scale.
Returns strategy:
- State return windows clearly (e.g., 14 days non-damaged returns)
- Provide clear care instructions to avoid 'not as expected' returns
- Offer partial refunds when prints are damaged in transit; work with POD partner on replacements
- Keep test prints of new designs until you establish a track record
Clear communication and good mockups reduce returns more than you might expect.
Automation, tools, and when to use Artomate
Automation reduces the friction that limits a POD business's growth. You can do everything manually with effort, but automation makes scaling repeatable.
What automation actually saves you
Automation removes repetitive, error-prone steps: mockup placement, resizing images for each listing, filling titles and tags, and bulk uploading. I used to spend full afternoons on those tasks. With automation I reclaim that time for design and testing. If you want hundreds of listings, automation stops the work from being the limiting factor.
Concrete savings I observed after automating:
- Mockup creation per design: from ~45–60 minutes to ~5–10 minutes
- Uploading and filling listing details per variant: from ~20–30 minutes to ~3–6 minutes
- Bulk resizing and exporting: from ~30 minutes to ~5 minutes
Automation also reduces errors in titles and tags, producing cleaner analytics.
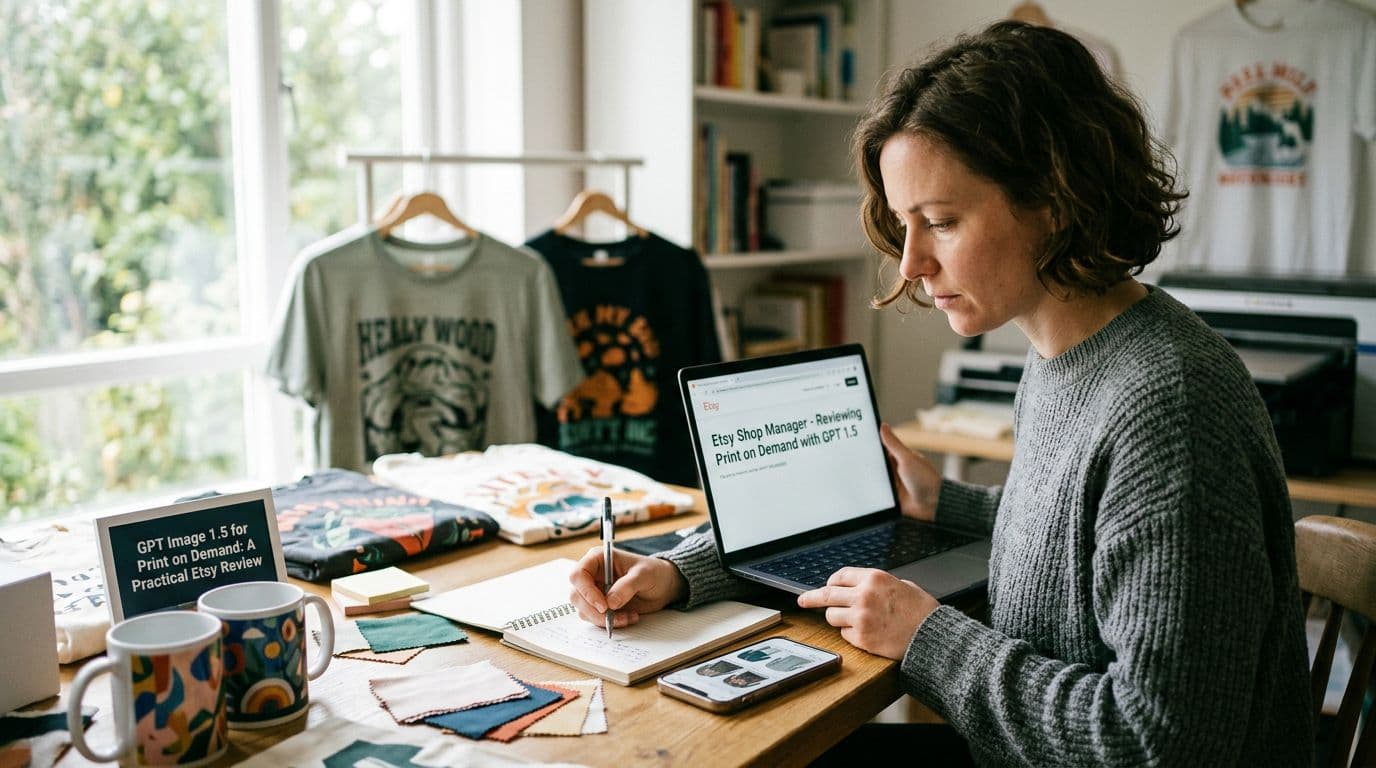
How I use Artomate in my workflow
This is exactly why we built Artomate — to automate the mockup-to-listing pipeline so you can focus on design. I push designs from generation to mockups and then to draft listings. I still review and tweak titles and tags, but the heavy lifting is automated. That cut my listing creation time per design from hours to minutes.
What Artomate handles for me:
- Batch placing artwork into multiple mockup templates
- Exporting correct sizes and filenames for each POD variant
- Generating draft listings prefilled with a title template and tags
- Scheduling uploads or creating drafts for manual review
If you prefer alternatives, look for tools that provide similar building-block automation: batch mockup placement, CSV uploads, and naming templating. The key is avoiding manual copy/paste at scale.
Other tools I use
I pair generation models with a few other tools for final polish and uploads. I use a high-quality upscaler for big prints, a simple ICC-aware editor for color tweaks, and a spreadsheet system for asset management. When testing ad spend I use basic analytics to track impressions, CTR and conversion. Combine tools that do one job well and avoid monolithic suites that try to do everything.
My go-to list:
- Upscaler: Topaz Gigapixel (or similar neural upscaler)
- Color/editor: Affinity Photo or Photoshop with ICC support
- Mockup automation: Artomate (or scripted Photoshop actions)
- Spreadsheet & versioning: Google Sheets + Drive, optional Git LFS for larger assets
- Analytics: Etsy Shop Stats + custom UTM tracking for ads
Risks, legal issues, and the near future
This is the sober part: AI tools are fast, but misuse creates risk. Here are the key legal and operational pitfalls I watch for.
IP and likeness risks
Don’t ask GPT Image 1.5 to replicate trademarked characters or real people. I keep prompts descriptive for style rather than naming protected references. If you accidentally produce an image resembling a trademark or celebrity, you risk takedowns and disputes. Document your prompt history and edits as part of your risk management.
If you get a takedown:
- Remove the listing immediately
- Preserve all prompt and provenance logs for a potential appeal
- Contact your POD partner if they fulfilled the order; they may have additional documentation or insurance
Avoidance strategies:
- Use original compositions and generic style descriptors
- Avoid text in image unless it’s generic or your own
- Test with a small batch before advertising heavily
Provenance, metadata, and policy direction
The C2PA metadata embedded by GPT Image 1.5 gives you a defensible record. I save that and export prompt logs to my archives. Policy and platform enforcement will likely get stricter around provenance, so having those records now is a practical hedge. Think of it as insurance you can’t afford to skip.
I also recommend periodically exporting a digest of your active listings and their provenance files to an offline archive. If policies change or platforms request evidence, you’ll appreciate having organized records.
Preparing for model changes and scale
Models update. What works today could shift next month. I guard against surprises with versioned prompts, test prints, and a small batch strategy: I upload 10–50 listings, measure for two weeks, and only scale winners. That disciplined approach keeps me from sinking big ad budgets into a design that stops performing after a model update.
Operational tips:
- Re-run a small sample of your best designs on a new model version to check for consistent outputs
- Keep 10–20% of your catalog intentionally static so you have baseline comparables
- Monitor your top 50 listings weekly for sudden drops in conversion; changes often indicate external factors (seasonality, platform algo shifts) but sometimes trace to model behavior or POD changes
Final Thoughts
GPT Image 1.5 is a practical tool for Etsy print-on-demand sellers who need predictable, repeatable artwork at scale. It cuts iteration time, gives reliable edits, and embeds provenance that helps with documentation. You still need the basics: test prints, color proofing, clean metadata, and sensible pricing. Use the model to produce consistent collections, but add human curation, clear listings, and good mockups.
A few closing practical takeaways:
- Start small and prove the design with a test print before scaling.
- Keep versioned prompts and C2PA metadata to protect yourself and make reproduction easy.
- Automate mockups and listings as soon as you can; the time savings compound quickly.
- Use structured prompts and inpainting to maintain consistent collections.
- Document your pricing math and margins to make sure winners stay winners even with ad attribution costs.
If you’re serious about scaling a poster shop, automate the grunt work and focus on testing and branding. The technical improvements in GPT Image 1.5 make that possible now. I built workflows around these capabilities and they pay back quickly once you pass the point where manual work becomes the bottleneck. Keep records, order test prints, and price with your POD costs and Etsy fees in mind. You’ll move faster, keep margins healthier, and avoid surprises.
For anyone starting now: practice prompt discipline, store prompt and output provenance, and treat OpenAI image generation outputs as the first draft that a skilled human polish will turn into a saleable product. The combination of a high-quality GPT image model Etsy sellers can rely on and thoughtful operations is what moves a maker from hobby to profitable shop.
If you want a ready-to-run starter checklist and prompt templates exported as a CSV for your first 20 designs, ping me and I’ll share the resources I use to move from idea to test print in under 48 hours. This is an AI poster review with a bias toward shipping product, not theoretical speculation — AI should make the work easier, not add more unknowns. Use it to accelerate, but keep the engineer’s checklist handy.
George Jefferson
Founder of Artomate
George has generated over £100k selling AI-generated posters on Etsy and built Artomate to automate the entire print-on-demand workflow. He writes about AI art, Etsy strategy, and scaling a POD business.
Learn more about me →