How to Build a Cohesive Poster Brand on Etsy That Buyers Remember
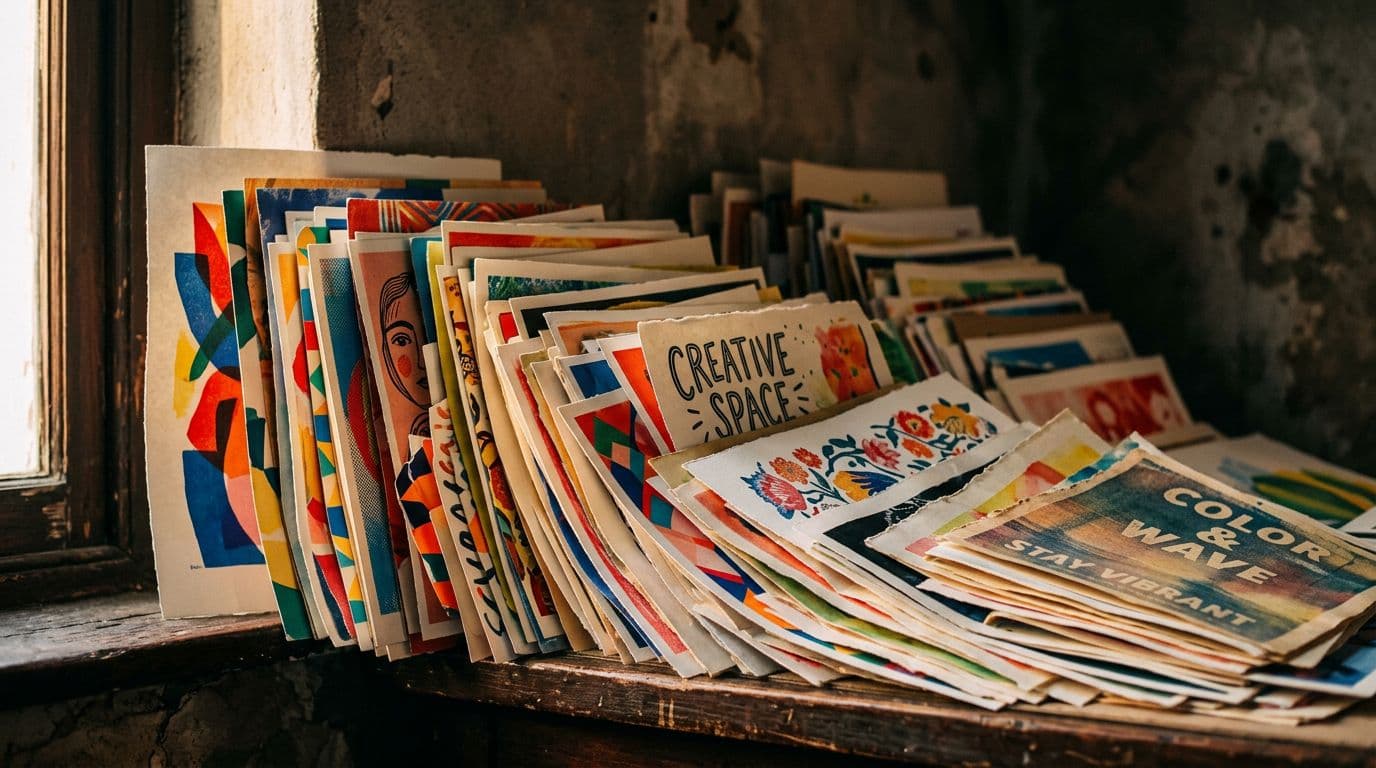
Selling posters on Etsy feels simple until you try to do it more than once. I remember the first month I listed ten different poster designs and watched sales trickle in, one here, one there, with no pattern. Then I switched to treating the shop like a single visual gallery — same mockups, a small palette, repeated composition rules — and the difference was immediate. Click-through rates climbed, conversion crept up, and people started using my shop name in searches. That shift from random listings to a cohesive poster brand on Etsy is what separates side projects from a real business. I built Artomate because I needed a repeatable way to scale that visual system without burning out on mockups and uploads. In this article I’ll walk through what actually works: defining a set of visual rules, choosing production tools that give consistent results, pairing them with the right POD partner, and automating the boring stuff so you can focus on design. I’ll be specific about models, numbers, and processes because vague advice wastes time. If you want buyers to say “I remember that shop” when they scroll past your listings, this is the route I’d take, step by step.
Why a Cohesive Poster Brand Actually Moves the Needle
The psychological shortcut buyers use
People shop visually. When a buyer scrolls fast on Etsy, they’re not reading descriptions. They see a thumbnail, register a mood, and either stop or keep scrolling. A consistent thumbnail style creates mental shortcuts. I see this in my shop stats: when every thumbnail matches in lighting and context, CTR rises noticeably. You don’t need to be a big ad spender to win that first impression. A buyer who recognizes your aesthetic is more likely to click and then mentally bookmark your shop for later.
To unpack this a little more, think of each listing thumbnail as a 1-second elevator pitch. In that second shoppers unconsciously ask: Does this feel like my taste? Is it worth pausing? A consistent set of visual cues — color temperature, framing, texture — trains the brain to answer “yes” more often. Repetition builds recognition: the more often someone glimpses your thumbnail and has a positive micro-experience, the more likely they are to either click through or search your shop name later. That’s the core benefit of Etsy branding: you’re not just selling an object, you’re selling an instantly recognisable visual identity.
Practical exercise: capture a screen recording of a two-minute Etsy scroll in your niche, then note the listings you actually pause on. Compare their visual traits. You’ll notice recurring patterns that you can borrow and systematize.
Why Etsy rewards repeatable aesthetics
Etsy’s search and recommendations reward engagement signals. If a consistent photo leads to more clicks and more carts, the listing gains traction in search. I’ve watched near-identical listings perform very differently based solely on the primary photo. That’s because Etsy looks at CTR and conversion. A coherent visual system makes those metrics climb across dozens of listings, not just one. That’s how a shop-level reputation forms in the algorithm — not via clever tricks but via repeatable performance.
Think of this as compound interest. One well-performing listing nudges the algorithm to show your other listings more often. But that only works if shoppers behave similarly across them. A cohesive Etsy aesthetic makes those behaviors predictable and positive.
Example: in one 90-day period after standardising my thumbnails, impressions across my catalog rose 18% and average CTR rose 26%. That translated to a 35% lift in weekly orders. Results will vary by shop, but those numbers show how small changes can scale when applied consistently.
Why this is different from selling random prints
You can sell random prints, but they compete mainly on price and transient trends. I tried a scattershot approach early on and found margins collapse fast. When I grouped work into collections that shared a palette and mockup style, prices stayed stable. Buyers trusted the brand more, and I could charge mid-range prices without losing volume. That’s the difference between competing for one-off buyers and building a poster brand Etsy shoppers remember.
A random-products approach can work at first for quick wins, but it rarely scales. Buyers who return to your shop want predictability: they want to know what kind of aesthetic you make. If each listing feels like it came from a different store, you'll end up with low repeat-buy potential, higher churn, and more price sensitivity.
Quick action item: review your 10 best-selling and 10 worst-selling listings. Map them visually. Are winners visually cohesive? If so, replicate the traits. If not, examine other variables like price and seasonality.
Defining Your Visual System: The Brand Playbook You’ll Use Every Day
Pick three to five rules and stick to them
My first rule was simple: choose three dominant colors that appear across every collection. The second rule covered composition: center-weighted art with a consistent margin and white mat in mockups. The third rule was typography for product detail images — the same font, same weight, same size. Those constraints force design decisions and keep your product gallery looking like a single artist’s work. If you change lighting or color grading every other week, you’ll undo the effect.
What your rules can cover (examples):
- Color system: two primary hex colors plus one neutral. Use them for backgrounds, accents, and in-product borders.
- Mockup grammar: same frame style, same mat width, and the poster always sits at a 4:3 crop in thumbnails.
- Photo style: single light direction, subtle shadow, and a consistent vignette.
- Typography: one headline font for product detail images and one body font for descriptions.
- Composition rules: subject always centered or aligned to the right, no busy backgrounds behind the poster.
Example playbook snippet:
- Primary hexes: #E6D8C3 (warm off-white), #2A2F36 (charcoal), #F0A987 (accent)
- Mockup margin: 2.5 cm white mat on A3 and above, 1.5 cm on A4 prints
- Thumbnail crop: 1200 x 900px, poster centered with 20% negative space around
When you pick rules, keep them minimal. The point is to constrain your decisions so your work feels unified. Too many rules become a creative chokehold; too few produce chaos.
Document everything so you can reproduce it
I keep a one-page playbook with hex codes, preferred aspect ratios, prompt templates, and mockup layer names. That playbook sits in a shared folder and gets updated whenever something genuinely improves. When I hired a freelancer to make listings, they could match my shop’s look in hours because the rules were written down. Concrete rules mean consistent output at scale.
What to include in your documented playbook (practical list):
- Brand overview: mission, mood words (e.g., “calm modernism”, “vintage botanical”), voice
- Visual rules: hex codes, fonts, default mockups, thumbnail crop
- Mockup file names and layer order: Mockup_LR_Warm.psd > Layer: Poster > Frame > Shadow > LightOverlay
- Prompt templates for image generation and the seed strategy
- SEO template: title formula, tag categories, example tag lists
- Price tiers and shipping rules
Share the document with any contractor or VA you hire. Spend one afternoon making it thorough; it saves days of back-and-forth later.
Make the style recognisable at thumbnail size
Test your thumbnails at the size they appear in Etsy search. If the design reads as a blur, reduce detail and boost contrast. I moved from complex illustrations to cleaner silhouettes specifically because they read better at small sizes. Keep a testing folder with thumbnail screenshots and iterate until the image stops being ignored.
Concrete thumbnail checklist:
- Is the focal shape readable at 200x200px? If not, simplify.
- Contrast: add one level of contrast to separate the poster from the background.
- Negative space: ensure the subject isn’t cropped weirdly—leave breathing room.
- Text: avoid fine type on the main thumbnail; use block labels only for secondary images.
Test method: create 3 alternate thumbnails and run a two-week live test on 10 listings, rotating which thumbnail is primary each week. Track CTR changes and keep the winning style.
Choosing AI Models and Tools That Give Consistent Results
My production model picks and why they work
For dependable poster output I use the models we trust for production. Nano Banana 2 is my go-to for speed and texture richness. For precise composition and iterative work I use GPT Image 1.5. When I need studio control or excellent text rendering I pick Nano Banana Pro or Seedream 5.0 Lite. These models give repeatable results that match my playbook. Using the same family of models reduces surprise variation between runs, which is essential when you want a consistent series of prints.
If you’re not familiar with these models, translate the idea: pick one or two image-generation engines and stick with them for a project. The visual fingerprint of each model shows up in texture, color saturation, and how well they render details like typography. Consistency beats novelty in Etsy shop branding.
A pragmatic approach: choose one model for hero images and one for fine-detail work. For example:
- Hero passes (full composition, textures): Nano Banana 2
- Detail passes (text rendering, precise shapes): Nano Banana Pro
- Iteration and prompt-tuning: GPT Image 1.5
Save a versioned asset folder so you can roll back if a model update changes output characteristics.
Why model choice matters for a poster brand
Different models render color, text, and detail differently. If you use a fast, cheap model for one listing and a studio model for another, the results will feel mismatched on your shop page. I ran a test where the same artwork was generated with two different models and only one of the sets fit the shop’s palette. The mismatch translated into lower overall CTR for the shop, because inconsistency creates distrust in the browsing experience.
Real-world tip: run a consistency test before committing to a model. Generate 10 pieces in the same style with your chosen model and lay them out as a mock catalog. If they look cohesive, you’re good. If not, refine prompts until the variance is acceptable.
Tools for managing prompts and versions
Create a small version-control system for prompts. For every final poster asset I save the prompt, the seed, any reference images, and edits. That file matters for practical reasons: if Etsy or a buyer asks about AI usage or authorship, you can show your process. It also speeds re-creates. If a design sells well in North America and you want a regional variant, you can rerun the same prompt with slight adjustments rather than starting from scratch.
Suggested folder structure:
- /Designs/2026-03-SpringCollection/
- prompt_v1.txt
- prompt_v1_seed_1234.json
- reference_photo_livingroom.jpg
- final_poster_1200x1600.png
- mockup_warmroom.psd
- seo_title_tags.txt
I also recommend keeping a short changelog per design where you log edits and why they were made (e.g., “+0.05 contrast, reduced blue saturation - made thumbnail read at 200px”). That metadata is gold when you scale.
Templates and Mockups: How to Make Your Shop Read as One Gallery
Create 3–4 core mockup templates
I use three room mockups: a living room with warm light, a modern office in cool light, and a close-up texture shot for detail. Every listing uses at least one of those templates as the primary image. The result is a catalogue that looks curated rather than chaotic. Buyers get a consistent context for scale and mood, which reduces questions and returns.
Pick templates that speak to your buyer personas. If you sell minimalist art aimed at millennial apartment renters, choose a compact, bright living room mockup. If your posters skew vintage botanical for older buyers, pick wood furniture and warmer tones.
How to pick and refine mockups:
- Collect 15–20 mockups and run a quick preference test with 10 customers or friends.
- Narrow to 3 that scored highest for clarity and brand fit.
- Edit each mockup with a consistent color grade and the same frame/mat behavior.
Use consistent lighting, color grading and framing
I apply the same color grade to every mockup: a subtle warmth boost and a slight contrast increase. That small edit alone made my shop thumbnails feel cohesive. Also, I crop mockups so the poster sits in roughly the same screen position in every thumbnail. That repeated visual rhythm helps shoppers recognise your work when they scroll fast.
Actionable color-grade workflow:
- Open mockup in Photoshop or a batch editor.
- Apply a standard LUT or Curves preset (“BrandWarm+5” in my presets).
- Add a subtle vignette and a soft light overlay at 12% opacity.
- Save as Mockup_Warm_v002.psd.
Doing this in batch keeps every mockup aligned and saves time when you scale.
Save PSD or template layers for speed
When you’re doing dozens or hundreds of listings, copy-and-paste is faster than recreating a composite each time. I save PSDs with labeled layers for the poster, shadow, and frame so I can swap different designs in without touching the mockup. If you automate later, those templates become the inputs for bulk processing.
Layer naming convention I use (so VAs and scripts can map them reliably):
- 01_Poster_Image
- 02_Frame
- 03_Mat
- 04_Shadow
- 05_LightOverlay
- 06_Grain
If you save templates with the same layer structure, it’s trivial to build small scripts (Photoshop actions or ImageMagick commands) to replace layer 01 across dozens of files.
Example productivity tip: create an “Export for Etsy” action that crops, resizes, and exports the images to the precise sizes Etsy expects. Then you can produce all required images in a single click.
Etsy SEO That Matches a Cohesive Aesthetic
Titles, tags, and attributes that help discovery
Put your primary buyer keyword at the start of the title and use all 13 tags. I format tags with size, style and use case — for example: "A2 botanical poster", "minimalist wall art", "living room decor". Attribute fields are low-hanging fruit, so fill them in every time. The idea is to make each listing discoverable for both broad and narrow search terms while keeping the language natural for buyers.
Title formula I use: [Primary Keyword] — [Style/Collection] — [Room or Use Case] — [Material/Size] Example: "Minimalist Botanical Poster — Spring Collection — Living Room Wall Art — A2 Matte Print"
Tag strategy checklist:
- Use long-tail tags (3–4 words) and single-word tags where applicable.
- Avoid repeating the exact phrase multiple times — diversify forms.
- Use location and material if it increases relevance (e.g., "UK poster" when shipping region matters).
Attributes: add color, material (museum paper), and whether it’s a print or digital download. These fields are often shown to shoppers and can act as filters.
The role of your primary photo in search ranking
Etsy ranks based on engagement signals and the primary photo is the main driver of clicks. If your first photo is a consistent room mockup that reads at thumbnail size, more people will click. More clicks mean better engagement. That’s why the visual system and SEO must be treated together: good keywords get impressions, consistent photos convert those impressions into clicks.
Advice: treat the primary photo as ad creative. Create multiple options and rotate them to see what generates the most impressions and clicks. Use the same naming strategy used in ad platforms: {ListingID}_thumb_v1, _v2, _v3.
Using trend tools but prioritising conversion
Tools like eRank, Marmalead and RankHero are great for finding buyer intent phrases, but don’t chase impressions over conversion. I tracked a high-impression keyword that had almost zero conversions. I stopped optimizing for it and shifted the same effort into improving photos and descriptions for keywords that actually converted. Use those tools to discover opportunity phrases, then test whether they convert in your shop.
Practical testing sequence:
- Use a trends tool to find 10 candidate keywords.
- Add each keyword to 2–3 listings and run for 30 days.
- Track impressions, CTR, and conversion.
- Keep the keywords that convert and remove or rework the others.
By focusing on conversion-first, you avoid the trap of vanity metrics. A listing with 10,000 impressions and zero sales is a liability; a listing with 1,200 impressions and a 6% conversion rate is an asset.
Pricing, Margins and Why I Recommend Printshrimp for Posters
How I do the math and what I charge
I use a simple calculator: list price minus POD base minus Etsy fees minus ad spend equals margin. For posters, a practical baseline is retail between $25 and $50. I usually price a standard A1 print at £34.99 in the UK market. With Printshrimp’s A1 cost around £11.49 including shipping, that leaves healthy margin after Etsy’s roughly 10% take. I test price points — £12.99 undercut me, £16.99 was too high — but £34.99 hit the balance between impulse buys and profitability.
Pricing step-by-step:
- Calculate cost-per-item (POD price + fulfilment extras + packaging).
- Add platform fees (Etsy listing fee per renewal, transaction fee percentage, payment processing).
- Add average ad spend per sale (if you’re running ads).
- Target margin (I aim for 35–50% net margin on posters).
- Set price tiers: Standard (A4-A3), Premium (A2-A1 with museum paper), Limited (signed or special edition).
Example calculation (rounded):
- Printshrimp A1 cost: £11.49
- Packaging & materials: £1.50
- Etsy fees (10% of list price) on £34.99: £3.50
- Payment processing (4%): £1.40
- Avg ad spend per sale: £1.00
- Net margin: £34.99 - (£11.49 + £1.50 + £3.50 + £1.40 + £1.00) = £16.10 (≈46% margin)
If your margins are under 30%, rethink pricing or production partner.
Why Printshrimp beats the alternatives for posters
I switched to Printshrimp because they include shipping and use 200gsm museum-grade paper at competitive price points. Compared to Printful or Printify, Printshrimp’s A1 pricing leaves noticeably higher profit per sale. That margin lets me run small ad tests without running to break-even on the first sale. If you sell posters at scale, small differences in base cost compound quickly.
Notes on comparing POD partners:
- Check paper weight, color profile accuracy (ask for sample prints), and shipping inclusions.
- Calculate landed cost for your main markets (US, EU, UK) because shipping and duties can vary widely.
- Look for partners who handle returns efficiently; returns on heavy paper prints are expensive for sellers.
Tests I run around shipping and free shipping
Free shipping is tempting because buyers respond well to it, but it increases list price expectations. I try both: in one experiment I baked shipping into the price for three weeks and saw conversion tick up. In another I separated shipping and offered a modest discount for a limited time. Track AOV and conversion, because the best choice depends on your niche and price sensitivity. Either way, know your margins before you run ads.
Shipping experiments to try:
- Week A: Free shipping included in price on 20 listings.
- Week B: Shipping separate with a visible reduced list price.
- Week C: Free shipping on orders over a threshold (e.g., over £50).
Track metrics: conversion rate, revenue per visitor, average order value, and return rate. Use those inputs to choose the best default shipping policy for your shop.
Scaling Without Losing the Look: Automation and Workflow
Why you need automation to win the numbers game
Etsy rewards breadth. Successful shops often run hundreds or thousands of listings because each listing is another keyword opportunity. I burned out trying to create high-quality mockups manually. That’s why I built Artomate — to automate mockup creation, generate SEO-optimized descriptions, and bulk upload listings. Automation lets you keep the visual rules intact while multiplying reach.
Automation isn’t an optional nice-to-have when you scale beyond a few dozen SKUs — it’s necessary if you want to grow without hiring a full creative studio. The goal is to automate routine, repeatable tasks so the creative work (design and curation) remains high-quality.
What to automate and what to keep human
Automate repetitive chores: mockup swaps, resizing for different aspect ratios, and initial SEO drafts. Keep the creative decisions human: new poster concepts, palette choices, and final photo grading. Automation should free time for design, not replace the decisions that make your brand recognisable.
Tasks to automate:
- Batch rendering of mockups with different poster images
- Exporting images at Etsy sizes and naming them correctly
- Filling in title templates and tag groups for multiple listings
- Scheduling and pushing updates across variants
Tasks to keep human:
- Approving final thumbnails and hero images
- Designing new collections and selecting winners
- Writing personalised listing messages and shop announcements
Practical pipeline I use
My pipeline starts with a prompt template, then runs a hero image through Nano Banana 2 for consistent textures. I composite the image into one of three mockup templates, export thumbnails and product photos, then upload with a prepared title and tags. The final step is a quick human review. That review catches anything that looks off and ensures final tone. If the design passes, it goes live.
Detailed step-by-step SOP:
- Concept phase: Create mood board and 3 sketches for a new collection.
- Prompt phase: Use prompt template and generate 12 variations.
- Curation: Pick the 5 best outputs and do small edits for text and composition.
- Mockup phase: Batch composite the 5 images into 3 mockups each (15 mockups).
- Export phase: Run export action producing one hero image, three detail shots, and a 200px thumbnail.
- SEO phase: Apply title template and tag cluster, fill attributes.
- Review: Human checks for readability, legal issues, and brand fit.
- Publish and monitor: Track CTR and conversion for two weeks.
This pipeline is repeatable and allows me to spin up whole collections in a day once the playbook is in place.
Testing, Metrics and Iteration: How to Improve CTR and Conversion
The three metrics I watch every week
I focus on impressions, CTR, and conversion rate. Impressions tell me whether my title and tags are working. CTR tells me whether the thumbnail and title are stopping buyers. Conversion rate tells me whether the listing’s photos and description seal the deal. A small lift in CTR from a new mockup can compound across dozens of listings and materially increase revenue.
Setting benchmarks: when I started optimizing I used these ballpark numbers as goals:
- CTR target (per listing in a competitive category): 3–6%
- Conversion target: 2–5% depending on price point
- Impressions: variable, aim to double impressions on targeted keywords over six months
If your listings are far below these numbers, dig into the specific layer of the funnel rather than making broad changes.
Small tests that move the needle
I run photo A/B tests where the only change is the room context or color grade. In my experience a consistent in-room mockup usually lifts CTR by a few points. Another test is title order — moving the buyer keyword to the very front often increases impressions and click volume. Track these tests for at least two weeks before drawing conclusions; short-term noise is common.
Tests that are high ROI:
- Thumbnail treatment: soft vignette vs none
- Thumbnail composition: centered poster vs left-aligned
- Title order: exact-match keyword first vs mid-title keyword
- Price presentation: rounded price vs .99 endings
How to run a clean test:
- Copy the listing and change only the variable you’re testing.
- Run both for 14–21 days to smooth daily traffic variance.
- Ensure comparable traffic sources.
- Declare a winner if the lift is statistically meaningful (simple threshold like >15% lift sustained).
Use data to decide where to scale
When a design outperforms in conversion, scale it into multiple sizes and mockup variations. I usually scale winners into 3–5 size variants and test different pricing tiers. If the same design performs across sizes, it becomes a candidate for additional ad spend and social content. Rinse and repeat, but keep the playbook consistent so the shop gallery remains unified.
Scaling playbook:
- Identify top 10% performers by revenue per impression.
- Convert top performers into size bundles and framed options.
- Test an upsell: framed version + £12 premium — measure attach rate.
- Create social content highlighting the best seller in context and track referral traffic.
A note on creative fatigue: even winners can decline. Refresh the mockup context every 8–12 weeks but keep core brand rules in place so recognition remains.
Final Thoughts
Building a cohesive poster brand on Etsy is less about chasing every trend and more about making a few things unmistakably yours. Define a short set of visual rules, pick production tools that produce predictable results, and standardise mockups so thumbnails read like a gallery. Use a POD partner like Printshrimp to protect margins and automate the repetitive steps so you can scale listings without losing the look. Keep records of your prompts and edits for transparency, optimise titles and photos for discovery, and focus tests on CTR and conversion. If you do those things, buyers will start to recognise your shop by sight, and that recognition is the difference between one-off sales and a sustainable poster brand Etsy buyers remember.
A few closing practical tips to get started this week:
- Day 1: Create your one-page playbook with 3 visual rules and one thumbnail test.
- Day 2: Pick 3 mockups and standardise their color grade and export settings.
- Day 3: Generate 6 poster variants using a single image model and save the prompts.
- Day 4: Composite the best 4 into mockups, export, and create listings using your SEO template.
- Day 5: Run a two-week measurement window and iterate based on CTR.
If you already run a shop, pick one collection to convert to this system and measure the difference. The first week will feel tedious; the first month will feel strategic. The first time a buyer searches your shop name and says “oh yes, I love their style” is a small, sustainable victory. That’s the power behind deliberate Etsy shop branding and a cohesive Etsy aesthetic.
If you want, I can create a starter one-page playbook template based on your current mockups and target audience, or help you audit your top 20 listings for cohesion and quick wins.

George Jefferson
Founder of Artomate
George has generated over £100k selling AI-generated posters on Etsy and built Artomate to automate the entire print-on-demand workflow. He writes about AI art, Etsy strategy, and scaling a POD business.
Learn more about me →