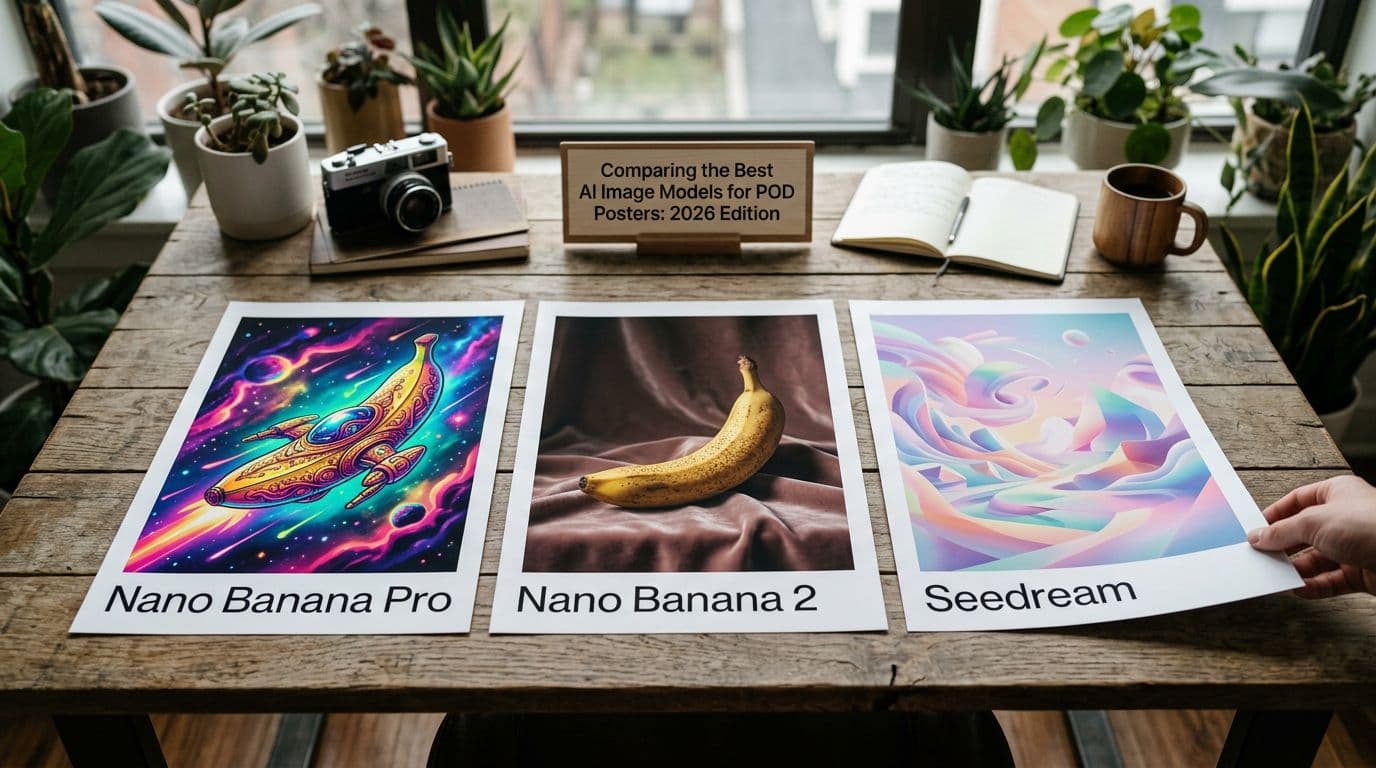
Best AI Image Models for POD Posters in 2026: Nano Banana Pro vs Nano Banana 2 vs Seedream
I remember the first time I ordered a 24x36 poster that arrived with banding in a blue gradient and a jagged headline that looked fine on-screen but ruined the whole piece. That mistake cost me £45, two days of customer messages, and a sleepless night wondering why I’d trusted a cheap mockup. Since then I’ve tested every major image model aimed at poster work, run hundreds of physical proofs with different POD partners, and tuned a workflow that balances speed, cost, and print quality. If you sell posters on Etsy, the model you use now affects more than how pretty a design looks on a thumbnail. It impacts margins, how many SKUs you can create, and whether your text-based designs actually print legibly. In 2026 three models stand out: Nano Banana 2 for speed and batch pricing, Nano Banana Pro for typographic fidelity, and Seedream 5.0 Lite for layout control and multi-reference consistency. I’ll walk you through what each model does best, how I test them, the trade-offs that matter for real shops, and the exact steps I take to turn a winning generation into a live listing that sells. Read this like a conversation over coffee — I’ll tell you what I actually use and why.
Why model choice matters for Etsy poster sellers
When I started using AI images for posters I treated every model as interchangeable. That was a costly mistake because posters are a product where resolution, texture, and type matter in ways a phone wallpaper doesn’t. A model that spits out beautiful color blending but mangles text will tank a typographic poster. A cheap fast model that softens edges will look fine at thumbnail size but fall apart at 24x36. So model choice affects two practical things: your cost per SKU and your conversion.
I care about cost per image because Etsy is a numbers game now. More listings mean more indexed keywords and more chances to get impressions. But each listing costs $0.20 to create and you pay API or model fees if you generate images programmatically. If your per-image cost is too high you can’t afford to test at scale. That’s where Nano Banana 2 shines — it gives me 2K–4K native outputs with batch pricing so I can make 50 variations without feeling the burn.
I care about conversion because Etsy rewards behavioral signals like CTR and conversion rate. High-quality thumbnails and realistic mockups raise CTR fast. A model that produces clean, printable art reduces returns and complaints. Nano Banana Pro gives me better typography where headlines and embedded copy need to be crisp, and that translates into fewer refund requests and higher satisfaction scores. Seedream 5.0 Lite sits between those two for me — great when I need structural consistency across a series, because keeping a character, color palette, or scene consistent across ten variants used to be a pain.
Here’s the practical takeaway: pick the model for the job. Use Nano Banana 2 for bulk image-first SKUs, Nano Banana Pro for typographic or premium lines, and Seedream when you need design-level consistency. The rest of this article explains how I test them, how I factor costs, and how I get a generated image into a listing that actually sells.
Nano Banana 2: speed, batch pricing, and mass production
Nano Banana 2 changed the way I scale. Before it I was sitting through slow iterations, tweaking prompts, and watching costs climb. Nano Banana 2 is fast and predictable. It outputs at native resolutions up to 4K, and the API supports batch calls that knock the per-image price down. That matters because I don’t want to spend £0.50 to generate one variant and £25 to test a niche. With Nano Banana 2 I can run 30–50 variants per concept, filter the top five, and move those to print testing.
The speed also affects my workflow because I can iterate in near-real-time. If the first batch returns washed-out blues, I update the color hint and run another batch. That iteration loop used to take hours; now it’s minutes. The model handles photographic and abstract textures well, so it’s my default for image-first posters where typography isn’t central. For those products I generate multiple aspect ratios — 16x24, 18x24, and 24x36 — at 2K or 4K depending on the final size I plan to sell.
What it’s not great at is perfect text rendering. I can get readable type when I add spacing and explicit font hints, but it’s not consistently sharp at large sizes if the design depends on small serif details. That’s why I treat Nano Banana 2 as a volume engine and reserve Pro for text-heavy work. Cost-wise, if you factor batch discounts it becomes feasible to generate thousands of thumbnails a month without blowing margins. If you’re running ads, that scale allows you to test many creative variants and find the thumbnails that move CTR up.
When I pick Nano Banana 2
I choose Nano Banana 2 when I need to crank out product sets quickly and keep generation cost low. Photographic posters, abstract art, and pattern-based designs are where it shines because those rely on color and composition more than tiny type details. I also use it for background images that pair with overlaid type added later in a PSD.
Prompting tips for Nano Banana 2
My prompt template for this model includes exact aspect ratio, color palette token, and a “type-safe” margin instruction so I can overlay text later. I generate variants by changing only one variable at a time — color, lighting, or pattern — so I can see what actually affects conversion.
When not to use it
Don’t use Nano Banana 2 for posters that must have readable embedded copy or tiny typography. If your design depends on a headline, logo, or multi-line poem set in a specific typeface, move to Nano Banana Pro for the first pass. Save Nano Banana 2 for scaling once the core look is proven.
Nano Banana Pro: why typography and fidelity pay off
Nano Banana Pro is the model I reach for when typography matters. Early on I tried to fake type by generating text-heavy images and overlaying fonts later, but that creates alignment and kerning issues when the image itself contains decorative copies. Nano Banana Pro gives far better text rendering and consistent fine detail, which makes it ideal for typographic posters, quote prints, and any design where embedded copy is part of the art.
The fidelity comes at a higher per-image cost, but I’ve found that cost makes sense for premium lines. When I tested the same typographic design across Pro and Flash models, the Pro output needed fewer iterations and fewer fixes in Photoshop. That lowers the total cost and time to market because I didn’t have to re-render the background or recompose the whole design. For framed prints and pieces sold at higher price points, customers notice the difference in print sharpness and I see lower return rates.
Another reason I use Pro is provenance tooling. Nano Banana Pro includes features aimed at provenance and quality control, which gives me better records for intellectual property and proof if someone questions where an image came from. That’s valuable because Etsy’s rules around AI disclosure are still being shaped. I still add a short AI disclosure in the description because buyers like transparency, but having provenance tools helps if there’s any dispute.
Ideal use cases for Nano Banana Pro
Use Pro for typographic posters, lyric prints, informational pieces, and anything with fine line work. If you sell calendars, maps, or posters with dates and small annotations, Pro saves you time because the text comes out cleaner. I also use it for premium product photos where texture detail matters, such as showing paper grain or fabric-like inks.
Cost vs reward
The per-image cost is higher, but the ROI comes from fewer iterations and higher perceived value. I price these prints at the top of my range — typically £34.99–£54.99 for standard sizes — because customers expect better print quality. That pricing keeps my margins healthy after fees and POD costs.
How I validate Pro outputs
I always order a physical test print from my POD partner when using Pro. Digital zoom can hide artifacts that appear on ink. I set the model to output at 4K and export in sRGB at 300 DPI. That combination has matched Printshrimp proofs consistently, which matters because Printshrimp’s paper and shipping model helps keep my margins predictable.
Seedream 5.0 Lite: layout control and multi-reference consistency
Seedream 5.0 Lite surprised me when I first tried it because it thinks like a designer. Where Nano Banana 2 is speed-first and Pro is detail-first, Seedream sits in the middle with strong visual reasoning and multi-reference handling. If I want a ten-piece series with the same lighting, a consistent character, and coherent color balance, Seedream gives me far fewer mismatches.
The multi-reference input is what I use for collections. I feed a reference palette, a mood board image, and an exemplar composition. Seedream then keeps those constraints across batches so I don’t get wildly different outcomes in each generation. That saves a ton of manual editing when I prepare mockups and thumbnails. For product lines that rely on consistent brand feel — think a set of nursery prints or a travel series — Seedream reduces churn.
Price-wise, Seedream 5.0 Lite has attractive first-purchase packages and generally competitive per-image rates. Its visual reasoning also shortens iteration loops because the model understands spatial relationships better. If I instruct it to leave a centered type-safe area and balance negative space, it actually does that with fewer prompts. That predictability is valuable when you want to automate parts of the pipeline.
Best fits for Seedream
I use Seedream for small series, illustrative work that must keep character consistency, and layouts where foreground-background relationships matter. It’s my choice when I want the design to read as a family rather than a set of unrelated images.
Prompting and reference strategy
My Seedream prompts include two to four reference images and a strict layout token. I keep language simple and repeat key constraints like "centered headline area" and "consistent warm lighting." That helps the model prioritize the elements I care about without micro-managing every pixel.
Where it loses out
If your priority is absolute typographic perfection or lowest possible per-image cost, Seedream is not the number-one pick. It’s a designer-friendly tool that reduces creative overhead across a series, but for single-image bulk production Nano Banana 2 is cheaper, and for razor-sharp type Nano Banana Pro is better.
My step-by-step testing workflow (how I pick winners)
I test models the way a scientist runs an experiment. I control variables, measure outcomes, and keep records. The goal is to identify winners I can scale without guessing. I run the same prompt across models, export at target resolution, order physical proofs, and then compare conversion once the listing is live.
First I separate use-cases. If a concept is image-first — landscapes, abstracts, textures — I run it in Nano Banana 2 at 2K and 4K to check edge clarity at print scale. If the concept includes embedded text or small line art, I run Nano Banana Pro. For series work where the look must match, I run Seedream with 2–4 reference images. Separating like this stops me from wasting Pro credits on abstract sets or Nano Banana 2 on text-heavy pieces.
Next I set a consistent prompting template. That template includes aspect ratio, color palette, and a "type-safe" area. I create 10 variants per prompt. Ten gives me a statistically useful batch without drowning in choices. From those 10 I pick the top three, export at 4K, and prepare mockups. I always include one real-photo proof shot in the listing gallery.
I keep a simple spreadsheet where I track model, prompt, per-image cost, revisions, POD proof cost, and final SKU price. That lets me calculate accurate margins because the API costs matter. If a design required three Pro renders and two print proofs before I listed it, those costs go into the SKU math.
Test batch sizes and selection criteria
I generate 10 variants and select three finalists based on readability at thumbnail size, edge clarity at full size, and how easy the image is to mockup. I prefer images that leave space for product details and a clear focal point. That improves CTR and makes mockups look professional.
Print validation step
I always order a physical test in the largest size I plan to offer. If I’m selling up to 24x36, I print at that size. The physical proof catches color shifts, banding, and any text fuzziness that doesn’t show on screen. I’ve caught issues twice now where a design looked fine on screen but printed with visible posterization — both times it saved me from listing a dud.
Rolling winners into scaled SKUs
When a design passes the print test I create multiple size listings and at least three lifestyle mockups. I use the mockups to test thumbnails and rotate them in ads. I initially price conservatively to collect data and raise price once I see stable conversion and steady sales.
Integrating models with POD partners — why Printshrimp matters
Where you print matters as much as which model you use. I learned this the hard way after switching POD partners mid-season and seeing margins evaporate. For posters, shipping and paper quality are the main drivers of cost and perceived value. That’s why I work with Printshrimp for poster SKUs. Their A1 pricing around £11.49 including shipping gives me predictable margins that I can rely on when I price for Etsy fees and advertising.
Printshrimp also uses 200gsm museum-grade paper with options for satin or matte without extra cost. That matters because premium prints need to feel premium to command higher prices. If I sold the same design through a cheaper POD printer with thinner stock, returns and complaints went up. With Printshrimp I get fewer quality issues and faster dispatch times from UK, EU, US, and Australia, which means lower shipping-related headaches for buyers and for me.
Integration strategy is simple. I export images at sRGB 300 DPI at the native size my POD partner recommends. I ask Printshrimp for their preferred crop and bleed guidelines, then build the image with those margins. That reduces trimming surprises and ensures the finished print matches the mockup. When I use Nano Banana Pro the higher fidelity aligns with Printshrimp’s paper, so the physical product justifies the higher price.
How I choose a POD for posters
Price, shipping, paper weight, and dispatch time are my checklist. I only work with a POD partner when I can clearly model margins and order a proof in 48–72 hours. Printshrimp meets those requirements for posters better than any other partner I’ve used. I’ve compared A1 pricing across popular suppliers and found Printshrimp’s all-in price to be more competitive once shipping is included.
Practical integration tips
Always request a proof before a big launch. Keep the file structure tidy: one folder per SKU with generation metadata, the source prompt, and a screenshot of the final listing. That log helps if there’s a dispute or if you want to re-run a generation later with the same prompt.
Automation and mockups: scale without soul-sapping busywork
Automation changed my business. I used to spend eight hours a week creating mockups and uploading listings. After I automated that work I reclaimed that time for designing and testing new concepts. The trick is automating the repetitive steps while keeping creative control over the outputs you share with buyers.
I don’t mean auto-posting raw model outputs. I mean running a pipeline that generates images, produces consistent lifestyle mockups, attaches metadata and SEO-friendly descriptions, and queues listings for review. That’s exactly why we built Artomate — to automate the mockup-to-listing pipeline so you can focus on design decisions. Using tools like that let me scale from 50 listings to 600 without hiring a VA for three months.
Automation also reduces human error. When I generate 200 images a week manually, it’s easy to forget to attach a real print photo or to use the wrong tags. With an automated flow I standardize titles, attributes, and tag usage while keeping room to customize copy for high-priority SKUs. The result is consistent metadata that improves indexing and makes iterating predictable.
What I automate and what I keep manual
I automate generation, mockup creation, metadata templating, and bulk uploads. I do not automate final listing approval, pricing decisions for premium lines, or the creation of special seasonal copy. Those remain manual because they need human judgment. Automation should save time, not turn your shop into a factory that lists poor-quality art.
Where to start with automation
Start by automating the weakest part of your workflow. For me that was mockups — I created a few high-quality room shots and an automated process to place prints into them with realistic shadows. Once mockups were automated I focused on automating the SEO boilerplate and bulk uploads. If you upload more than five listings a week, automation pays for itself quickly.
I use automated tools to save prompt templates and to keep a revision history for each generation. That history is gold when I want to reproduce a look for a new size or rerun a prompt with improved settings.
Pricing math, per-image cost, and healthy margins
When people ask me how much their AI images should cost, I give a single rule: include every cost. That sounds obvious but most sellers miss API credits, print proofs, and Etsy fees. I model every SKU with these line items: per-image generation cost, POD base cost, proofing cost, Etsy listing and transaction fees, payment processing, and an ad spend assumption. Once you add those up you know the floor price.
In practice that looks like this. If I generate a poster on Nano Banana 2 at batch pricing and the per-image cost is £0.40, the POD base is £11.49 for an A1 from Printshrimp, Etsy takes roughly 10% total, and I plan for £1 in proofing amortized over the SKU, my cost structure lets me price at £34.99 and keep a 40–60% gross margin on standard sizes. For Pro outputs where generation might be £1.50 per image and the product is framed or premium, I price closer to £44.99–£54.99 to preserve a similar margin.
You should always run a sensitivity table. Change the conversion rate, ad spend, and per-image cost to see at what point your SKU becomes unprofitable. Many sellers assume conversion will stay high when they increase listings, but that only holds if your thumbnails and copy are strong. My spreadsheet tracks conversion, CTR, and ACoS so I can pull SKUs that underperform quickly.
Pricing bands I use
I keep three bands: standard, premium, and curated. Standard posters sit around £24.99–£34.99, premium posters with better typography and prints sit at £34.99–£54.99, and curated limited lines go higher. I pick the model based on band: Nano Banana 2 for standard, Nano Banana Pro for premium, Seedream for curated series where consistency adds perceived value.
Per-image cost control
Use batch calls when available. Limit revisions by testing small batches first. Keep a shared prompt library to avoid repeating failed prompts. If your per-image cost is eating margin, move more of the visual work to in-house PSD templates and use cheaper generations for backgrounds that you then refine manually.
SEO, thumbnails, and converting Etsy traffic
High-quality images only matter if people click. Etsy’s search system rewards listings that get clicks and convert, so thumbnails are your single most important asset. I spend more time optimizing a thumbnail than I used to spend writing a title. The thumbnail needs a clean focal point, a clear sense of scale, and a real-photo proof somewhere in the gallery.
For titles I front-load buyer phrases. Put the primary search term in the first three words — that helps both Etsy and buyers scanning results. Tags and attributes must be used thoughtfully: choose 8–10 strong tags that reflect buyer intent like "minimalist botanical poster" or "nursery animal print" rather than stuffing generic tags. I monitor impressions, CTR, and conversion and change thumbnails when CTR drops. Little tweaks — brighter color, clearer type, or a framed vs unframed mockup — can move CTR substantially.
AI disclosure should be short and human. I add one sentence: "This design was created with the help of AI and professionally prepared for print." That builds trust and avoids surprises. Etsy hasn’t enforced disclosures aggressively, but buyers appreciate transparency and it reduces awkward messages.
Thumbnail testing cadence
I run A/B tests on thumbnails for the first two weeks after listing. I upload two thumbnails and swap if one underperforms. If a listing doesn’t get impressions within 14 days I refresh keywords and try a new mockup. Freshness matters because Etsy values active shops and new content.
Driving external traffic
Pinterest and TikTok work well for posters because the visuals are shareable. I pin lifestyle mockups directly and run low-budget TikTok tests around a new series. External traffic helps when you’re testing new keywords because it brings additional behavioral signals that Etsy notices.
Legal, provenance, and what to watch next
Models and marketplaces are shifting fast. Google’s Nano Banana Pro introduced provenance tooling that helps with source tracking. BytePlus’s Seedream has its own compliance layers. That’s good because it gives sellers a record of where images came from if a question arises. I recommend keeping your prompt logs, saved reference images, and model metadata for every SKU.
Don’t generate copyrighted characters or logos. It’s tempting to make a quick sale on a fan piece, but takedowns and disputes cost time and reputation. Keep prompts conservative and favor original compositions. If you ever suspect a model’s output resembles a copyrighted image, rerun with stronger constraints or drop the concept.
Etsy’s AI disclosure guidance is recommended practice, and I use it. Official enforcement has been light as of 2026, but I add a one-line disclosure to each AI-assisted listing because it reduces buyer friction. If rules change you want to be able to show you acted in good faith. I also review each model’s ToS for commercial use. Some providers have different terms for derivative content and identifiable people.
Where I expect things to go
Models will keep improving at speed and fidelity. I expect more models to offer batch pricing, higher default resolutions, and better text rendering. POD partners will compete on price and shipping speeds for posters, which will squeeze margins on commodity prints and push differentiation toward premium, curated lines. Automation will become table stakes — sellers who don’t automate generation, mockups, and metadata will get outpaced.
Practical legal steps I take
I keep a folder with every prompt, reference image, and the model name/version used. I save a screenshot of the generation settings and the final output. If there’s ever a dispute, that folder proves my process. It also makes it trivial to re-run a generation with the same parameters if a customer requests a reprint.
Final Thoughts
If you’re launching or scaling a poster line in 2026, pick tools based on the product and not the hype. Nano Banana 2 gets you volume and low per-image cost so you can test many niches quickly. Nano Banana Pro gives you the accuracy you need when type and fine detail matter, and Seedream 5.0 Lite keeps series consistent when design coherence is the product. Pair the right model with a POD partner that gives you predictable margins — Printshrimp is the partner I use for posters — and automate the mockup and listing work so you can focus on what sells. Keep testing, always order a physical proof, and log everything. The winners are the sellers who iterate fast, protect margins, and present their products professionally.
If you want to automate mockups and bulk listings without rebuilding a pipeline from scratch, consider trying Artomate for streamlining generation-to-listing work. I built the tool after burning days on manual uploads, and it’s saved me weeks in operational time while letting me design more.

George Jefferson
Founder of Artomate
George has generated over £100k selling AI-generated posters on Etsy and built Artomate to automate the entire print-on-demand workflow. He writes about AI art, Etsy strategy, and scaling a POD business.
Learn more about me →