Automate Etsy Listings and Scale to 1,000+ Products in 2026
Scaling an Etsy print‑on‑demand shop to 1,000+ listings used to sound like a fantasy. I remember the days when every mockup, every title, every tag was manual and I burned through weekends just to keep up. By 2026 that brute‑force approach is a dead end. Etsy rewards breadth: more listings mean more keyword matches and more chances to be found, and AI tools now let you generate and publish hundreds of products a week without turning your life into a spreadsheet nightmare.
I built Artomate after learning that I couldn't grow past a few hundred SKUs without automation. I tested pipelines, models, and POD partners, and found a pattern that works: standardised prompts and mockup templates, predictable production models, a strict QA gate, and bulk listing automation. That’s what this article lays out. I’ll explain exactly how I run ideation, generation, mockups, QA, and staged rollouts, which models and POD partners I use, the errors I see people make, and the operational playbook I follow when I scale to 1,000+ listings. If you're serious about scaling, you need to design for repeatability and compliance from day one, because mistakes at scale cost real money.
Why scaling to 1,000+ listings matters in 2026
Etsy’s search now rewards shops that give it more options to index. I’ve watched this personally: when my shop grew from 200 to around 700 listings, impressions rose in ways that weren’t proportional to the item count. The reason is simple — each listing is another keyword entry point, and Etsy’s model gives weight to shops that appear active and wide in coverage.
This matters most for print‑on‑demand because the product catalog is easy to vary. A single design with five styles and four sizes becomes twenty SKUs, and those long‑tail buyers are exactly who converts. I aim for a 500‑listing milestone first because that’s where the indexing benefit becomes obvious, then push to 1,000 as a second phase.
There’s risk in scale. Publish thousands of listings without a QA process and you’ll see takedowns, returns, and unhappy buyers. But don't let that stop you. The right pipeline reduces operational work and increases returns because you can find winners quickly, double down on them, and prune the rest.
Why breadth beats a tiny curated catalog
A small catalog can do well, but it limits learning. With volume you learn which keywords and images actually convert instead of guessing. I treat listings as experiments: get enough experiments running and the winners show up reliably. That’s how you find evergreen search phrases and seasonal hits.
The economic case for scaling
More listings spread fixed costs like tooling and ad creative across many SKUs. It also reduces risk: one hit can fund dozens of low performers. For posters, using a POD partner with good base pricing means you can sell many mid‑price items that convert on impulse and still keep margin.
Why automation is non‑optional
Manual workflows simply don't scale. I could not have reached the 700 listing point without programmatic image generation and bulk listing tools. Automation is how you move from a hobby shop to a repeatable business model.
Current market trends and what they mean for you
Etsy still has a huge buyer base, and that makes it an attractive platform for POD. Public filings and marketplace reports show tens of millions of buyers and several million sellers. That means volume and competition at the same time. The trick is to align volume with quality — publish enough listings to own niche search queries while keeping production and listing quality high enough to convert.
Fees remain a reality you must model. There is a $0.20 listing fee, a 6.5% transaction fee, payment processing around 3% plus a small fixed amount in many regions, and Offsite Ads that can bite at 12–15% when attributed. I always model a worst‑case scenario with Offsite Ads applied, because it keeps margin planning conservative.
Buyers now expect better photography, lifestyle photos, and short videos. I used to think a simple clean mockup was enough. That stopped working. Listings with lifestyle images and a quick 10‑15 second video consistently get better CTR and conversion, because they answer the buyer’s question: how will this look in my space?
What this implies for product types
Home decor, posters, and art prints remain consistent winners for POD. They map well to lifestyle visuals and travel well through social channels. Personalised items still convert but require stronger IP controls. I choose niches where a clean mockup plus a single lifestyle shot tells the full story.
Seasonality and the calendar
Seasonality still shapes cash flow. I plan major pushes for November and the lead‑up to peak holiday traffic and begin testing seasonal ideas in August. That gives time to iterate mockups and titles before the holiday window.
Why you must measure Profit Per Visitor (PPV)
Clicks are nice, but profit per visit is what tells you whether scale makes sense. I track PPV for cohorts — batches of listings pushed together — and use it to decide whether to keep investing in a niche. If PPV drops when I scale, I stop and rework creative or pricing.
The automation pipeline I use: a six‑phase rollout
I don’t automate everything at once. My pipeline is staged and repeatable, with human QA at defined gates. The phases I use are ideation and keyword mapping, template and prompt library creation, image generation and variation, mockup and lifestyle production, QA and compliance, and finally bulk listing and monitoring.
This pipeline gives me control. Automate the repetitive heavy lifting and keep people at the points where judgment matters. That balance scales results while avoiding disaster.
Phase 1 — ideation and keyword mapping
I start with keyword tools like eRank and Marmalead to find long‑tail phrases that buyers use. I build a seasonal calendar for each niche so I can prioritise what to generate when. I then map keywords to title templates and tag groups so generation ties directly to discoverability. I organise those keywords by funnel intent: discovery, consideration, purchase.
Phase 2 — template and prompt library
I create a finite set of design templates and saved prompt files. Each prompt is versioned and includes the model, seed, and any reference images. Versioning is essential because you have to reproduce or audit any image later. I keep a simple naming convention so I can tell at a glance what prompt generated which image.
Phase 3 — batch generation and variation
I generate designs in batches, typically 50–100 per day when I’m accelerating. I use production models (I’ll explain my picks later) and store metadata with every image: prompt, model, seed, date, and license snapshot. That metadata is the golden record if a platform or customer asks about provenance.
Phase 4 — mockups and lifestyle media
After generation I apply art to PSD mockup templates and create lifestyle images. I also render short videos from those mockups; even a 10–12 second clip moves the needle on listing CTR. Web‑optimized images get exported alongside print‑ready files at 300 DPI.
Phase 5 — QA and compliance gate
I sample every Nth image for a manual check of IP issues, hallucinated text, and print alignment. I also do physical prints for a tiny percentage of every batch to ensure colors and cropping work in the real world. All checks are logged against the asset record.
Phase 6 — bulk listing and staged rollout
I push drafts into a staging shop first, then release 50–200 listings per day. I watch impressions, CTR, conversion, and PPV. Winners get additional size/format SKUs created automatically; losers are either retired or reworked. This staged approach keeps the shop healthy and prevents mass takedowns.
Which AI models I use and why they matter
Not all image models are equal for production work. Over the past two years I tried many, and the models I rely on now give predictable outputs, handle typography well, and offer clear commercial licensing so I sleep at night. I use GPT Image 1.5 for tight edits, Nano Banana Pro and Nano Banana 2 for studio‑quality renders, and Seedream 5.0 Lite when I need very high resolution or near‑perfect text rendering.
Choosing a model is about repeatability. You need consistent color, predictable composition, and strong text rendering so you don't ship posters with unreadable slogans. I select models for those strengths and keep a fallback plan if a batch has issues.
GPT Image 1.5 — my go‑to for edits and speed
I use GPT Image 1.5 when I want precise composition control and fast iteration. It handles predictable changes and edits well, so I can take a base image and produce variations without the results going off the rails. That lets me make on‑the‑fly tweaks to size and crop for different poster aspect ratios.
Nano Banana Pro / Nano Banana 2 — studio results
Nano Banana Pro and Nano Banana 2 are my workhorses for more complex scenes and consistent output across multiple characters or recurring subjects. If I need a set of botanical prints that look like they're from the same series, Nano Banana gives me that visual consistency. Use these models when you want a cohesive set that reads as belonging together.
Seedream 5.0 Lite — high resolution and typography
When I need 4K output and very accurate typography, Seedream 5.0 Lite is my choice. It produces tight text and crisp details that reduce cleanup time. That matters when you build mockups that show readable titles or when you need to keep the print file sharp across large poster sizes.
Practical prompt practices I use
I version prompts and include a short anti‑trademark clause so I don't accidentally generate protected characters. I save the model, seed, and prompt alongside the final image. When a prompt generates a trend or style that works, I lock it and use it as a template for variations. That repeatability is what enables scale.
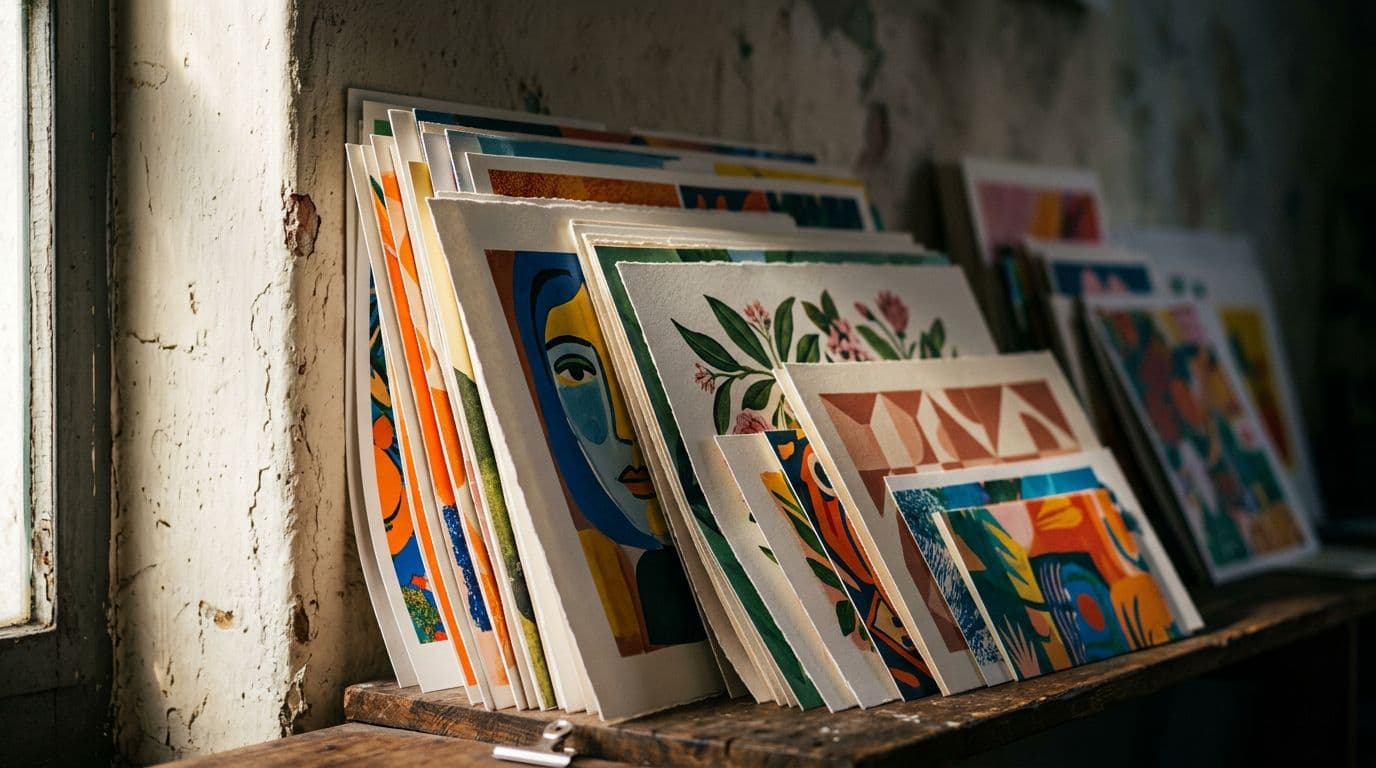
Mockups, print prep, and visual assets that convert
Mockups and lifestyle images are the parts buyers see before they buy, so they matter more than the raw design. I build a simple PSD system where each artwork is auto‑placed into multiple mockups: a clean hero, a contextual lifestyle shot, and a framed wall shot. I also render a short video showing the poster in a room. Those three media types are my standard.
Producing print‑ready files and web assets at the same time saves headaches. I export a 300 DPI TIFF or PNG for print and a compressed JPEG/WEBP for the listing. That way the file you send to your POD partner is the same file you tested, reducing surprises.
PSD mockup templates and automation
I have a folder of PSD templates with smart objects and consistent lighting. The automation step swaps in the new art, flattens a copy for web, and produces the print file. This keeps the hero image consistent across hundreds of listings and cuts manual work dramatically.
Lifestyle images and short videos
A single lifestyle shot answers the buyer’s question about scale and mood. I use AI‑assisted room mockups to place the poster in a real context and then generate a short 10‑12 second video that pans slightly and shows the poster from multiple angles. On Etsy those short videos move impressions to clicks more than another static image.
Print specs and colour checks
I always create print files at 300 DPI and check dimensions for common poster sizes. I also order physical proofs for every new batch of templates. A small number of actual prints catches color shifts, contrast problems, and edge cropping issues that screen checks miss.
Choosing POD partners and per‑SKU economics
Margins decide whether scale is worth it. I picked Printshrimp for posters because their pricing keeps the numbers sane. For an A1 poster they charge around £11.49 including shipping. When I price at £34.99 that leaves room for fees and ad spend while still returning profit. If printing or shipping costs more, you won't be able to scale profitably even with perfect conversion.
You need to run worst‑case fee scenarios. I build a spreadsheet that applies a 15% Offsite Ad attribution, payment processing at 3.5%, and Etsy's 6.5% transaction fee. If the math still works — and your PPV target stays positive — you can scale. If it doesn't, tweak price or move the SKU off the roster.
Why Printshrimp for posters
Printshrimp beats Printful and Printify on poster pricing when shipping is included. That single fact changes economics. If your POD partner charges extra for shipping, the impulse price point you need to hit becomes unreachable. Printshrimp's regional dispatch points also shorten delivery times, which helps conversion.
Alternatives and when to use them
Printful and Printify still make sense for other product types or if you need broader catalog variety. Gelato can be useful for certain international markets. I use Printshrimp for posters and lean on Printful or Printify when I need mugs or apparel attached to the same niche because they handle those SKUs better.
Per‑SKU pricing rules I follow
For posters I target a 30–40% gross margin after POD base cost and before ads. For planning I set break‑even PPV and a target PPV that accounts for two months of advertising spend. If a listing can’t hit that target in 14 days of live traffic, I pause it and rework creative or price.
Listing automation tools and the workflow I actually use
Bulk listing is where you save time. Doing images is one half; getting titles, tags, attributes, and images into Etsy is the other. I use several tools depending on the task. For mockup‑to‑listing automation I use Artomate because it was built to push entire poster workflows — images, SEO titles, tags, and uploads — in bulk. For post‑live edits I use a mix of Vela and Etsy’s bulk editor for quick changes.
Automation without control is dangerous. I always publish to drafts first, check a sample, then publish in batches. That lets me roll back quickly if a batch underperforms or triggers an issue.
How I structure titles and tags
I fill all 13 tags and every relevant attribute. Titles start with buyer language — what someone would type into search — followed by secondary descriptors. I avoid keyword stuffing. For example, a title I used recently started "Minimalist Botanical Poster 16x24 - Abstract Plant Wall Art" and then I used the remaining characters for color and room keywords. That approach gets impressions and still reads like something a buyer would search for.
Drafts, staging shops, and rollout cadence
I publish into drafts and keep a small staging shop for extreme testing. I release 50–200 live listings per day, monitor impressions and PPV for 7–14 days, then iterate. If a set of listings gets impressions but low CTR, I update the hero image and title. If impressions are low, I reworked tags and attributes.
When to use bulk editing and when to re‑create listings
If the problem is SEO or photos, bulk edits can fix it. If the design itself is the issue, I kill that SKU and re‑generate a variation. Don't spend hours mass editing listings that are fundamentally poor performers.
QA, compliance, and protecting your shop at scale
Scaling amplifies mistakes. I blew this lesson early on when I pushed too fast and got a handful of listings flagged for possible IP issues. Since then I built a compliance gate with a few simple steps: prompt controls, IP keyword filters, manual sampling, license records, and a rollback plan.
Every image gets stored with a license snapshot and the exact prompt, model, and seed. If Etsy or a buyer ever asks, I can provide provenance. I also add a brief AI disclosure in descriptions when it makes sense. Even though Etsy enforcement is rare in 2026, disclosure builds trust.
IP filters and prompt rules
I forbid trademarked characters and famous personalities in certain prompt templates. I run automated checks for common trademark terms and flag any asset that trips the filter. That prevents an obvious takedown before the listing goes live.
Manual sampling and physical checks
I sample every 10th to 50th image depending on batch size for a human review. I also order physical prints from the POD partner for a subset of every new template run. Screens can hide color or cropping issues; physical proofs catch them early.
Logging and rollback
I maintain a staging shop and an unpublish script that can bulk remove listings if needed. That script is part of my emergency playbook and has saved shops from large exposure events. I also keep a versioned archive of every listing’s text and images so I can restore or prove provenance if needed.
Scaling playbook: metrics, testing cadence, and operations
Moving from 200 to 1,000 listings is mostly operational. You need processes that keep creation fast, QA tight, and analytics actionable. I treat each batch like an experiment: push, monitor, learn, and decide.
Your core KPIs are impressions, CTR, conversion rate, and PPV. I watch PPV most closely because it tells me whether I’m actually making money from the traffic I’m attracting. If a batch has good impressions but terrible PPV, it means either pricing or conversion is off.
Testing cadence I follow
I push batches of 50–200 listings. Let them run for 7–14 days to collect enough data. If they don’t hit a minimum PPV or conversion threshold in that window, I pause and rework. Winners get new sizes and variations automatically.
Pruning and reinvestment
I prune aggressively. If a SKU hasn’t hit a defined performance threshold in 30 days, I unpublish it. That frees up headroom and prevents weak listings from dragging down shop signals. I reinvest the savings into the next wave of designs that are variations on winners.
Team and outsourcing tips
You don’t have to do this all yourself. I outsource parts of the pipeline: a VA for keyword research and draft uploads, a designer for prompt tuning, and a QA person for sampling. Keep the creative loop tight and the decision‑making centralised so you don’t lose the pattern recognition that comes from seeing results.
How I decide to hire
I hire when marginal output from automation justifies the payroll. If adding a VA lets me push an extra 200 listings a month and those listings maintain PPV, payroll is profit. Until then, automate and keep the team small.
Final Thoughts
Scaling an Etsy POD shop to 1,000+ listings is possible and practical in 2026, but it requires a pipeline that treats creativity like production work. Standardise prompts, version everything, pick production models that give predictable results, and use a POD partner that preserves your margins. Automate the repetitive parts and keep people where judgement matters: QA, IP checks, and payoff decisions.
I built my process by making mistakes and documenting them. If you start with a staged rollout, keep detailed metadata for every asset, and measure Profit Per Visitor, you’ll avoid common traps and scale sustainably. Tools like Artomate can help remove the mockup‑to‑listing friction, and they’re worth exploring once you’re ready to publish at scale. If you want, I can share my spreadsheet templates and prompt library to help you get started faster.

George Jefferson
Founder of Artomate
George has generated over £100k selling AI-generated posters on Etsy and built Artomate to automate the entire print-on-demand workflow. He writes about AI art, Etsy strategy, and scaling a POD business.
Learn more about me →