How AI Image Generation Improved in 2026 — A Poster Seller's Playbook
AI image generation changed in ways that actually matter for Etsy poster sellers in 2026. I remember the days when a clean typographic poster meant hours in Illustrator, or paying a designer £60+ for a single concept. Over the last two years the models I use have become faster, more predictable with text, and capable of delivering print-ready images that need only small human edits. That means I can test dozens of designs a week instead of two or three. It also means the winners I scale have better consistency across sizes and mockups, which directly improves click-through and conversion.
If you sell posters on Etsy, this is not a theoretical advantage. Etsy rewards scale and testing. Better AI art quality and faster generation lets you build out a catalog quickly, find what sells, and iterate without bleeding margins. But there are traps. I forgot to order a proof once and lost a week fixing a color shift. I’ve seen sellers ruin margins by ignoring proper export settings or by picking a cheap POD that tacks on shipping later. This article is the practical guide I wish I’d had when Nano Banana 2 and GPT Image 1.5 hit the scene. I’ll show you which models to use, how I export for print, how to pick mockups that actually sell, what to automate and why, and the legal and policy moves you should make to stay safe and profitable.
Why this matters for Etsy/POD sellers right now
The short version is this: AI image generation improvements in 2026 have turned a bottleneck into an advantage. When text rendering and composition control improved, I stopped spending hours on simple layouts. I can now iterate colors, typography, and composition in minutes, not days. That means I can test 50 new listings in the time it used to take me to make 5. On Etsy, where more listings equals more keyword entries and more impressions, that speed compounds.
What Etsy actually rewards is visibility and conversion. Better AI poster quality raises the floor on design, but you still need strong mockups and good listing SEO to convert. Speed without process breaks down; you can flood your shop with low-converting images and waste listing fees. So the play is two-fold: use the latest models to create more high-quality options, and automate the repetitive parts so you can scale only the winners. That combination is what separates shops that plateau from shops that grow into full-time incomes.
H3: What changed technically in 2026
Model families released in 2026 improved three things I care about: text rendering, subject consistency, and native high-resolution outputs. Nano Banana 2, GPT Image 1.5, and Seedream 5.0 Lite give noticeably cleaner typography and predictable layouts. That reduces the time I spend cleaning up kerning, alignment, and misplaced elements. Also, API tiers are cheaper and faster, so batch-generating mockups is actually affordable.
H3: Why faster iteration matters on Etsy
Etsy's algorithm rewards listings that get impressions and clicks. When you can A/B test visuals or price tiers quickly, you learn which images get traffic and which convert. I moved from making one design per week to launching 10-15 concepts every week. That testing frequency let me find a style that converted 2.8% consistently, compared to my previous 1.6%. Doubling conversion without extra ad spend felt like free growth.
H3: Where sellers still trip up
Sellers assume better AI art equals better sales. It doesn’t. A great image needs correct export settings, the right POD partner, a solid mockup, and SEO that matches buyer search terms. I once uploaded RGB files directly from an AI tool and the colours shifted on print. Proofs save you that pain.
Current market trends and what the numbers mean
I watch marketplace numbers like a hawk because minor changes in costs or conversion can wipe out margins fast. Etsy’s fees haven’t budged: $0.20 listing fee and 6.5% transaction fee are still part of every sale. Payment processing takes another ~3% plus a small fixed amount depending on your country. Offsite Ads attribution can eat 12–15% of revenue if you don’t opt out under certain thresholds. Those numbers force me to price posters in bands that make sense.
In 2026 I saw most demand land in the $25–$50 band for wall art. That’s where buyers are comfortable and where you can also keep margins healthy if your POD partner is sensible. Conversion rates for established, well-optimized listings tend to sit between 1% and 3%. The best shops I follow push that into 3–4% by pairing great visuals with fast shipping and strong reviews. If you’re relying on organic Etsy traffic only, impressions multiply with listing count. That’s why I recommend scaling catalog size methodically while keeping quality checks in place.
H3: Model and tooling economics
AI providers now offer faster API tiers and lower per-image costs for high-throughput customers. Nano Banana 2 and GPT Image 1.5 make first-pass images more usable, which reduces manual cleanup time. That’s not just convenience, it’s real cost savings. When a model gives you a usable first pass, you cut designer hours or subscription costs.
H3: Channel performance and where buyers come from
Visual platforms drive the most high-intent traffic for posters. Pinterest, Instagram Reels, and TikTok now generate a steady stream of buyers for my shop. Pinterest is especially valuable because Pins live longer than Reels and keep bringing traffic. Email and repeat buyers convert at much higher rates than cold social, so I focus on capturing email on checkout and offering a small discount for returning customers.
H3: Fulfillment and partner competition
POD partners are competing on price and shipping-included packages. I use Printshrimp for most poster orders because the unit price and included shipping keep my margins healthy. For example, an A1 poster at about £11.49 shipped lets me sell at £34.99 and keep £20+ after Etsy fees. If you pick a partner purely on the lowest base price, you often lose on shipping, dispatch time, or paper quality.
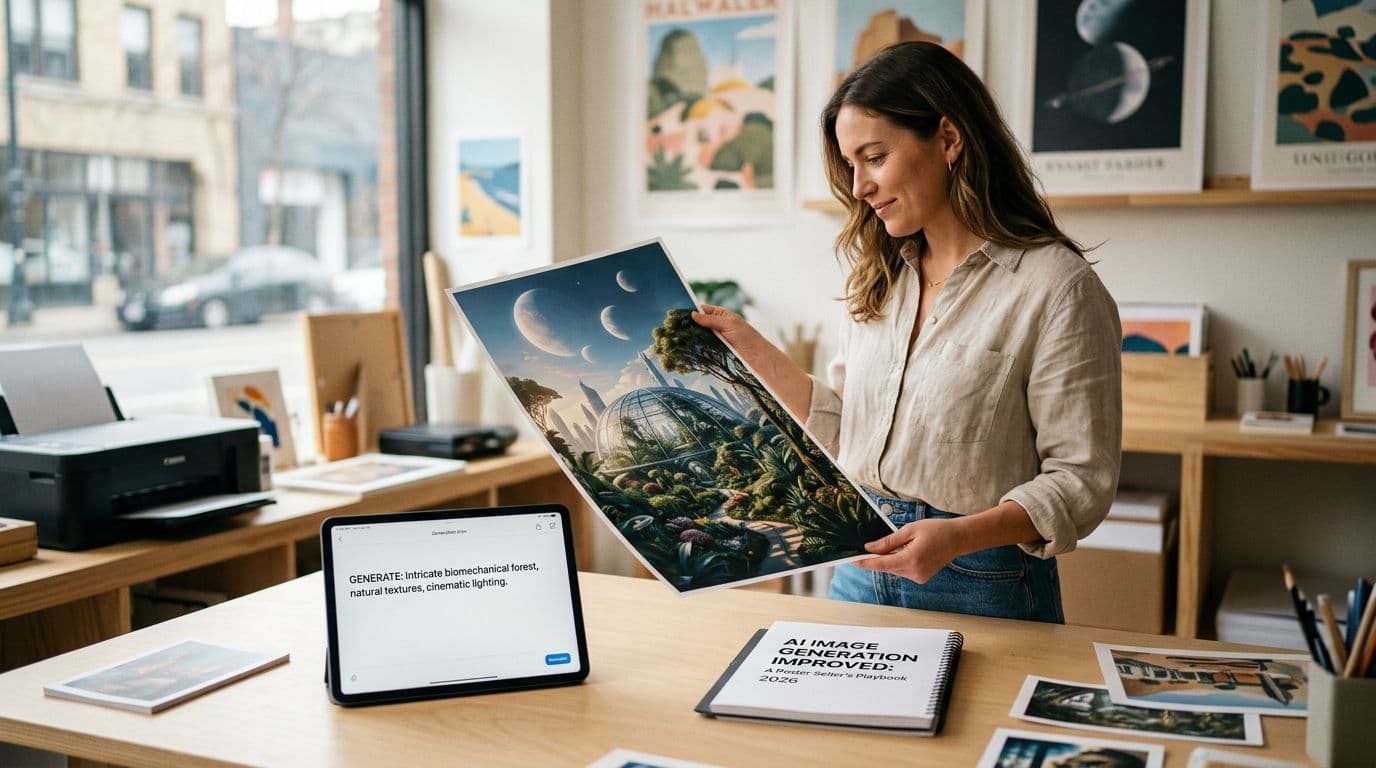
Models and when I use them in my workflow
I pick tools for specific jobs. I use Nano Banana 2 for quick concepting because it hits typographic and compositional notes fast. When I need predictable, studio-level control for a final file I move to GPT Image 1.5 or Nano Banana Pro. Seedream 5.0 Lite is my go-to when I need near-perfect typographic accuracy and spatial reasoning, especially for complicated multi-object posters.
Why split models? Because each has strengths. Nano Banana 2 is fast and cheap for exploration. GPT Image 1.5 gives predictable iteration and cleaner text at final export sizes. Nano Banana Pro gives nuanced control when I need consistent character or object placement across a collection. I don’t waste time trying to get everything perfect on one model when a two-stage approach saves hours.
H3: Quick concepting with Nano Banana 2
I start every collection with 20 concepts from Nano Banana 2. I batch-generate thumbnails at smaller sizes, then pick 5 to upscale. This model handles prompt-driven typography surprisingly well, so I can see a range of font treatments without typing in CSS. The speed means I can test visual direction without burning credits.
H3: Final assets with GPT Image 1.5 or Nano Banana Pro
Once I have a concept I like, I switch to GPT Image 1.5 for predictable composition and cleaner outputs. If the design involves multiple repeated elements or consistent scenes across sizes, I use Nano Banana Pro to lock down that consistency. Those models reduce the amount of manual kerning and layer cleanup I need in Photoshop.
H3: When to use Stable Diffusion variants and Seedream
If I need local control, fine-tuning, or to run a model behind a firewall, I use Stable Diffusion 3 variants. Seedream 5.0 Lite is worth testing when typography is mission-critical because its spatial reasoning keeps text aligned and readable. For most poster work I stick to the three main picks because they hit the balance of cost, speed, and fidelity.
The workflow I use: prompt to print, step by step
If you want a practical setup, use a two-stage flow: concepting, then polish and export. I’ll walk you through what I actually do each week.
- Concept batch. I run 20–30 prompts in Nano Banana 2 to find directions. I group prompts by theme and keep reference images for consistent style. 2) Narrow and refine. I pick 5 concepts and regenerate them at larger sizes in GPT Image 1.5 or Nano Banana Pro. 3) Edit and humanize. I refine typography and composition in Photoshop or Affinity. I add one or two human edits so the piece has demonstrable authorship. 4) Export for print. I export at target size at 300 DPI, set the correct color profile, and add bleed. 5) Proof and mockup. I order a single proof from my POD partner before mass listing. 6) Create mockups. I generate 3–5 high-quality room/lifestyle mockups and pick two that I A/B test. 7) List and test. I upload listings, fill all attributes, set initial ad tests at small budgets, and watch conversion.
I use one bulleted list here to keep the steps clear but I do all the details in prose. This sequence keeps me from wasting listing fees on designs that fail basic print or mockup quality.
H3: Export settings that actually matter
Always export at 300 DPI at the final print size and deliver a flattened 16-bit TIFF or high-quality PDF if your POD accepts it. If your printer requires CMYK supply it in CMYK. I learned the hard way that uploading RGB can shift colors. Add 3–5mm bleed depending on size and include crop marks when requested.
H3: Proofing and the single-proof rule
Order one proof before you upload 20 sizes. I do a full-size proof for the largest format I plan to sell. It’s the cheapest insurance policy I know. If the paper, color, or clarity is off you catch it before hundreds of listings go live.
H3: Automating repeatable steps
Automate mockup generation and title/tag creation once you have a template. This is exactly why we built Artomate — to automate the mockup-to-listing pipeline so you can focus on design. Use saved prompt libraries and preset mockup templates so each new design only needs a short review before listing.
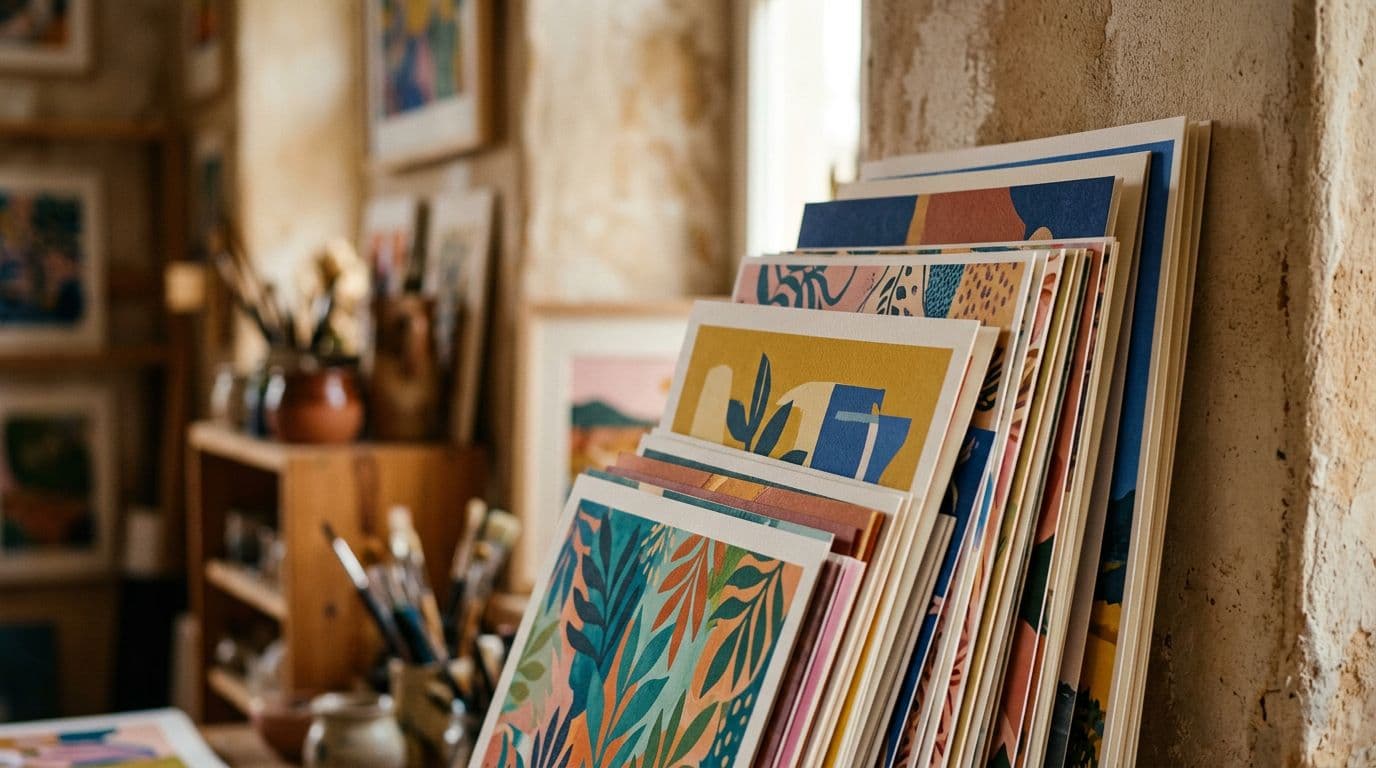
Mockups, first images, and conversion-focused photography
Mockups are where good designs become saleable products. Etsy buyers decide in a split second whether to click. That click hinges on your first image. For posters you need at least one lifestyle mockup, one framed close-up, and a clean flat-lay. I keep my mockup style consistent across a collection so the shop looks curated and trustworthy.
When I create mockups I think like a buyer. Will this poster look good on my living room wall? Will the frame or lack of frame be obvious? I test three main types: a warm living-room scene, a minimalist white-wall shot, and a scaled close-up showing texture and paper finish. The warm living-room shot usually lifts CTR the most because it helps buyers visualise placement.
H3: A/B testing first images
I A/B test two first-image variants for every new listing for a minimum of 72 hours. One variant is lifestyle-focused, the other is a clean product shot. I run tiny ad spends to get traffic and watch which one gets the better CTR and conversion. Often the lifestyle wins, but not always. That 3-day test saves me from scaling false winners.
H3: Mockup quality over quantity
Don’t upload five low-quality mockups. Upload three great ones. Low-quality or inconsistent mockups tell buyers you don’t care about the product. High-quality mockups lift perceived price and reduce returns.
H3: Creating consistent visual language
Maintain the same lighting and framing across your collections. Buyers who like one of your posters are likely to buy another if the shop looks like a brand. Consistency also makes A/B testing cleaner because you’re changing one variable at a time. I use reference shots and the same mockup templates so new listings slot into the same visual system quickly.
SEO and discoverability: Etsy search and external channels
Etsy search mixes relevancy signals, listing quality, and shop-level metrics. If you want to rank you have to treat titles, tags, and attributes like ad real estate. Front-load the primary keyword in the first 40 characters of your title because that’s what Etsy shows in many results. Use all 13 tags and set product attributes exactly. Treat attributes like free tags because they act the same way in search.
Image optimization is critical. The first image drives CTR and CTR influences how Etsy shows your listing. Great images mean more clicks, more conversions, and ultimately better placement. I also optimise my Etsy titles for Google by including common search phrases like “botanical wall art print 8x10” so Google Shopping pulls the right text.
H3: Leveraging Pinterest and social
Pinterest gives long-term traffic. A single good Pin can keep pulling visitors for months. I pin multiple mockups and write keyword-rich Pin descriptions. For short-term bursts I use Reels and TikTok, but I invest more time in Pinterest because those Pins compound.
H3: Tracking what works
Use Etsy Shop Stats to watch visits and conversion, but export weekly data to spot trends across images, keywords, and price points. I track visits-to-orders, average order value, and repeat purchase rate. Those three numbers tell me what to scale and what to pause.
H3: Offsite Ads and ad spend strategy
Start with small daily budgets to test variants. If you’re spending without testing you’ll burn through margin fast. Test images, price points, and audiences. I usually cap initial tests at £5–£10 a day and only increase when a variant reaches stable conversion metrics.
Pricing, margin math, and picking a POD partner
Good pricing starts with accurate cost math. Add POD cost including shipping, Etsy listing fees, transaction fees, payment processing, and expected ad spend. If you don’t include Offsite Ads you’ll underprice. My practical rule is to model at 10% Etsy overhead as a rough average plus payment processing costs and your fixed costs. That keeps my pricing decisions realistic.
I price posters in tiers for sizes. For example, I might sell 12x16 for £19.99, 18x24 for £29.99, and A1 or 24x36 for £39.99. Those price points fit buyer expectations and give room for profit after fees. I’ve tested pricing aggressively; when I raised a 16x24 from £24.99 to £29.99 I lost a few impulse buys but my overall per-sale profit improved significantly. For me, mid-range prices win because Etsy buyers treat poster purchases as decorative decisions, not impulse decor buys.
H3: Why Printshrimp for posters
In my experience Printshrimp beats other PODs on poster pricing because it includes shipping and uses 200gsm museum-grade paper. An A1 at about £11.49 shipped lets you price competitively and still keep a healthy margin. They dispatch quickly from multiple regions which reduces delivery complaints. If you choose a POD solely on headline unit price, you’ll often find unexpected shipping or slow dispatch later.
H3: When to test other PODs
Test Printful or Printify if you need broader product catalogs or if a specialized partner offers a unique paper or framing option. But always run a proof with each provider and compare actual prints. I once switched a best-selling design to a cheaper provider and lost two weeks fixing returns caused by inconsistent colour profiles.
H3: Margin math example
For a £34.99 sale: subtract 6.5% transaction fee (£2.27), payment processing (£1.05), POD cost £11.49, and a small ad spend of £1.50. You end up with roughly £18.68 before tax and any other overheads. That’s the kind of math I run before I list multiple sizes. If the number isn’t at least £8–£10 profit on larger sizes, I don’t scale it.
Common mistakes sellers make and how I avoid them
I’ve burned through these mistakes personally and learned the hard way. The most common one is skipping proper export settings. Uploading RGB web images instead of CMYK or failing to add bleed causes colour shifts and misprints. I fix this by having a single export checklist that I run every time: correct size, 300 DPI, bleed, and the color profile the POD requests.
Over-reliance on raw AI outputs is another trap. Many sellers upload AI outputs without demonstrable human edits. That increases IP risk and makes the art feel generic. I always add a human touch: a compositional adjustment, a unique overlay, or a small hand-painted texture. These changes take 10–20 minutes but make the design feel original.
H3: Skipping proofs costs time and money
Not ordering a proof is penny wise and pound foolish. I order a proof for the largest size before I list at scale. If colour or texture is off I catch it before hundreds of listings go live. It’s a small cost that saves headaches.
H3: Poor mockups that kill CTR
I once used inconsistent mockups across a collection and noticed a dip in CTR and session time. Buyers didn’t perceive the shop as professional. The fix was to standardise mockup lighting and framing, and regenerate images with those templates.
H3: Not tracking prompt and model versions
Keep a prompt and edit log. If you ever need to defend authorship or replicate a style across 200 listings, not having prompt/version history will cause chaos. I keep a CSV with prompt text, model name, model version, and key edits. That file has saved me when I wanted to re-generate a slightly different size or update metadata.
Future outlook and how I’m preparing
Expect even better AI poster quality this year. Models are moving toward tighter typographic control, more consistent subject rendering across multiple images, and native colour/profile controls. That means less manual work and cheaper batch processing. It also means that design differentiation will shift from raw image quality to concept, curation, and brand.
Legal clarity will keep moving too. The US Copyright Office still favours human authorship, so I plan to keep demonstrable human edits and thorough prompt logs. Etsy’s policy requires disclosure of AI use in listings, so I include a simple line in descriptions now. Buyer trust matters more as shoppers become aware of AI-created goods.
H3: Operational bets I’m making
I’m doubling down on automation for repetitive tasks and on a single POD partner for posters so I reduce fulfillment variability. I’m building a prompt library with reference images to make collections visually coherent. I also keep a proof checklist and proof every new paper type or size before listing at scale.
H3: Why small brands still win
Even with better AI art quality, small brands that have a clear visual language and fast testing cycles will win. Buyers still buy from shops that look cohesive and answer common shipping and returns questions clearly. So I invest in mockups, consistent listings, and email capture more than chasing every new model update.
H3: Tools that help me scale
Automation platforms and live benchmarking tools remain essential. I use tools like eRank and RankHero to benchmark keywords and pricing. For mockup and listing automation I use automation tools and templates. For the parts that take me too long to do manually I rely on saved workflows. If you’re doing more than five listings a week, automation pays for itself quickly. That’s one reason we built Artomate to make bulk mockups and uploads less painful.
FAQs I actually get asked a lot
Q: Do I have to disclose AI use on Etsy? A: Etsy’s creativity rules require disclosure. In practice enforcement has been limited, but I always add a short disclosure line. It takes seconds and builds trust with buyers who might care.
Q: Which model should I use for typographic posters? A: For text and typography I default to Nano Banana 2 for concepting and GPT Image 1.5 or Nano Banana Pro for final outputs. Seedream 5.0 Lite is excellent when text accuracy must be near-perfect. Keep a prompt log for defensibility.
Q: Can I copyright an AI-generated poster? A: Purely generative outputs without sufficient human input are likely not copyrightable under current US guidance. Add demonstrable human edits if you intend to claim exclusive rights and keep logs of your prompt and edits.
Q: What POD partner should I use? A: For posters I recommend Printshrimp for price and included shipping. Their A1 pricing around £11.49 shipped keeps margins healthy and dispatch is quick from multiple regions. Always order a proof first.
Q: How should I price posters? A: Model every cost and aim for price bands in the $25–$50 range for most posters. Larger sizes should give you at least ~£10 profit after fees if you want to scale sustainably.
Final Thoughts
AI image generation improvements in 2026 are not hypothetical upgrades. They changed the economics of poster selling. I use faster, text-accurate models to concept quickly and studio-grade models to polish final files. That saved me hours a week and let me test many more listings. The seller who wins will be the one who combines better model choices with a disciplined export process, consistent mockups, correct pricing math, and automation for the boring parts. Keep a proof checklist, a prompt history, and a single reliable POD partner. Do those things and improved AI art quality becomes real profit rather than just prettier images.

George Jefferson
Founder of Artomate
George has generated over £100k selling AI-generated posters on Etsy and built Artomate to automate the entire print-on-demand workflow. He writes about AI art, Etsy strategy, and scaling a POD business.
Learn more about me →